What's inside
As an Amazon Associate I earn from qualifying purchases. This post may contain affiliate links at no extra cost to you.
Our Top Picks

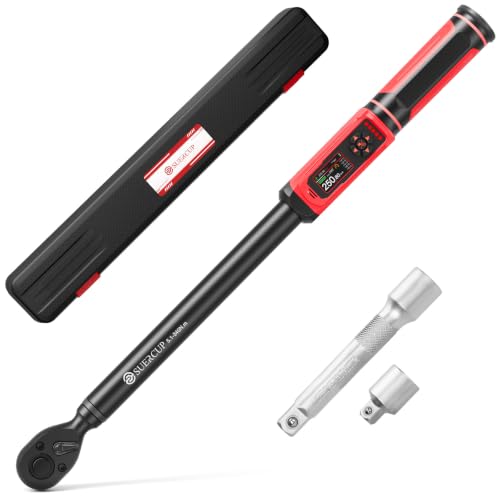


Best Torque Wrench With Angle Measurement: Choose by Fastener, Space, and Use
The best torque wrench with angle measurement for torque-to-yield work is a digital model that measures both torque and rotation, offers a clear target-and-angle display, and fits the fastener’s access constraints; for frequent professional use, choose a model with a durable ratchet head and a documented calibration service.
Shortlist: Which Type Fits Your Job?
- Best for repeat engine work: A digital angle torque wrench with a 1/2-inch drive, multiple target stages, and a flexible head. It suits common cylinder-head and connecting-rod procedures when the space allows the handle to swing.
- Best for tight access: A digital torque-and-angle adapter paired with a suitable hand ratchet or breaker handle. The smaller sensing unit can be easier to position than a long electronic wrench, though the added stack height may still be a problem.
- Best for occasional DIY: A mid-range digital wrench or adapter with audible and visual alerts, provided its torque range covers the specified value without operating near the tool’s minimum or maximum.
- Best for high-volume work: A professional digital wrench with traceable calibration, data storage, and a serviceable ratchet head. These features matter more when the tool is used often or the work requires records.
Comparison: Wrench Versus Adapter
Product specifications vary by model and revision. The figures below are practical selection ranges, not specifications for every tool in a category; verify the exact model’s manual before purchase. Examples of established digital tool lines include the Snap-on TECHANGLE family and the GearWrench electronic torque-wrench range. A digital adapter is a separate tool category rather than a particular brand recommendation.
As an Amazon Associate we earn from qualifying purchases at no extra cost to you.



| Type | Typical drive | Typical torque coverage | Added length or weight | Best fit |
|---|---|---|---|---|
| Digital angle torque wrench | 3/8 in or 1/2 in | About 10–200 ft-lb, depending on model | About 16–26 in; roughly 2–5 lb | Repeated work with clear access and one-piece setup |
| Digital torque-angle adapter | 1/4 in, 3/8 in, or 1/2 in | Commonly about 10–150 ft-lb; ranges vary widely | Often adds 2–4 in and several ounces | Occasional use or a kit needing multiple drive sizes |
| Electronic torque wrench without angle | 3/8 in or 1/2 in | Often about 10–200 ft-lb | About 16–26 in; roughly 2–5 lb | Torque-only jobs; not a substitute for angle measurement |
Check whether the manufacturer specifies accuracy as a percentage of reading or full scale, and whether angle accuracy is stated separately. Do not treat a display’s extra decimal places as proof of accuracy. A wrench rated ±2% of reading, for example, could be off by ±2 ft-lb at a 100 ft-lb target; that example does not establish the accuracy of any particular model.
What Matters for Torque-to-Yield Fasteners
Torque and angle accuracy
Torque-to-yield procedures commonly call for an initial torque followed by one or more rotation stages, such as a specified number of degrees. The exact sequence is vehicle- and fastener-specific. Choose a tool that can measure the required torque and angle range, and check whether its manual says it must be held in a particular orientation. On a cramped job, an angle sensor that is sensitive to tool movement or setup can be difficult to use consistently.
Use the correct starting torque and angle from the service procedure; a wrench does not determine whether a fastener is reusable. Many torque-to-yield bolts are intended for one-time use. Replace them when the procedure requires it, and do not improvise by applying a generic torque-plus-angle recipe.
Display readability and alerts
Look for large digits, a backlight, a clear unit indicator, and distinct alerts as you approach the target. A bar graph or progress indicator helps during angle rotation, particularly when the handle blocks a small screen. Audible and vibration alerts are useful when the display is out of view, but they should supplement—not replace—watching the reading and following the tool’s instructions.
Modes and setup
Useful modes include torque, angle, torque followed by angle, peak hold, and preset targets. For multi-stage tightening, confirm that the wrench can store or clearly guide the sequence you need. Before starting, select the correct units, set the target, confirm the drive direction, and reset the angle measurement as instructed. Some tools measure angle relative to their starting position; others require a separate setup step. Never assume the mode is configured correctly because the last job used the same tool.
Reach and clearance
A long handle provides leverage but needs room to sweep through the full angle. An adapter can reduce overall handle length, yet it adds height between the ratchet and socket and may prevent the socket from seating in a recessed location. A flex-head wrench can improve approach angle, but movement of the head during tightening may affect the procedure or tool setup. Check the complete tool-and-socket assembly against the available clearance before buying.
Match the Tool to Your Situation
| Your situation | Practical choice | Trade-off to accept |
|---|---|---|
| First torque-angle tool; occasional repairs | Digital adapter with clear display, buzzer, and an appropriate drive size | More setup steps and possible clearance issues at the socket |
| Regular engine work; moderate access | 3/8-in or 1/2-in digital wrench covering the specified torque range | Higher cost and a longer tool to store and position |
| Deep or crowded fastener location | Compare a low-profile adapter and a compact-head wrench using the actual socket | Neither option guarantees clearance; extensions and adapters can change access and technique |
| Frequent shop use or documented work | Serviceable model with calibration support and data recording | Calibration and upkeep add ownership cost |
Setup, Accuracy, and Ownership
Use this short pre-job check to avoid common errors:
- Confirm the procedure. Identify the fastener, required replacement status, torque stages, angle increments, units, and tightening order from the service information.
- Check fit before tightening. Install the socket and any necessary extension, then verify you can make the required rotation without hitting nearby parts. Follow the tool maker’s directions for extensions and angle measurement.
- Set and verify the tool. Select the correct mode and units, enter the target, check battery status, and zero or initialize the angle function as directed.
- Apply the specified sequence. Keep the socket fully seated and rotate smoothly. Stop at the target alert; do not add extra movement “for good measure.”
- Clean and store it correctly. Wipe off oil and debris, avoid impacts and excessive heat, and store the tool in its case. Follow the manual’s guidance for batteries and storage settings.
Common wear points are the ratchet mechanism, selector switch, display or keypad, and battery contacts. Dirt, drops, and using the tool as a breaker bar shorten its useful life. A torque wrench is a measuring instrument, not a general-purpose loosening tool. Keep calibration records and have the tool checked at the interval specified by its manufacturer or your quality requirements—especially after a significant drop, overload, or questionable reading.
Bottom Line
For frequent torque-to-yield work, a digital torque-and-angle wrench with a suitable range, readable screen, sequential modes, and available calibration support is the most convenient all-in-one choice. For occasional jobs or a tighter budget, a digital adapter can cover the same basic measurement task if its range and added height fit the application. In either case, match the tool to the service procedure and available clearance, not just the drive size or advertised feature list.