What's inside
As an Amazon Associate I earn from qualifying purchases. This post may contain affiliate links at no extra cost to you.
Our Top Picks
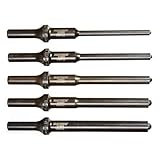
Choose a .401-Shank Punch That Fits Your Hammer and Pin
An air hammer roll pin punch can remove a stuck roll pin without flaring its end, but only when its shank matches the hammer, its tip suits the pin, and the tool is driven with short, controlled bursts. For a common .401-inch-bore air hammer, choose an attachment explicitly listed with a .401-inch shank; do not assume a punch made for a different shank standard will fit securely.
Check the air hammer manual before buying. “.401 shank” describes the attachment’s nominal shank size, not the punch tip diameter, and actual compatibility depends on the hammer’s bore and retainer. A loose shank can batter the retainer or slip; a forced fit can jam or damage the tool. Use the correct retainer, such as the specified spring or quick-change retainer, and make sure it captures the attachment fully.
As an Amazon Associate we earn from qualifying purchases at no extra cost to you.


Pick the Tip for the Job
- Roll-pin starter punch: A short, cupped or relieved tip supports the pin near its hollow center while helping keep it aligned. Use it to break a stuck pin loose and begin driving it out.
- Roll-pin punch: A longer pin-contacting tip is intended to continue driving a pin after it has moved. Choose a tip sized for the pin, with enough clearance to enter the pin’s bore without wedging inside it.
- Flat or general-purpose punch: Useful for solid pins and other tasks, but a flat-ended punch can contact the thin rim of a roll pin unevenly. It is not the preferred tip for a pin that must remain reusable.
Tip dimensions and naming vary among manufacturers. Match the punch to the roll-pin nominal diameter and follow its maker’s compatibility guidance rather than selecting solely by a listing’s “small,” “medium,” or “large” label. If the pin is badly mushroomed, corroded, or seized, plan to replace it; preserving an already damaged pin may not be possible.
Sizes, Air Settings, and Setup
The pressure figures below are conservative starting points at the tool inlet while the trigger is pulled—not universal specifications. The hammer manufacturer’s operating range takes priority. Compressor regulator readings can differ from pressure at the tool because a long or narrow hose, restrictive coupler, or undersized regulator causes pressure drop under flow.
| Pin diameter | Suggested first setting | Starting technique | When to increase |
|---|---|---|---|
| Up to 1/8 in. (3.2 mm) | 20–30 PSI | Single brief taps with a close-fitting starter punch | Raise in 5 PSI steps only if the pin does not move |
| Over 1/8 to 1/4 in. (3.2–6.4 mm) | 30–45 PSI | Short bursts; check alignment after each | Increase gradually if the punch stays seated and the work is supported |
| Over 1/4 in. (6.4 mm) | 40–60 PSI | Use a correctly sized punch and rigid support | Stay within the hammer’s rated range; switch methods if the pin stalls |
These ranges are starting points, not guarantees: pin material, corrosion, interference, hammer design, and lubrication all affect the force required. Begin at the low end. More air pressure is not a substitute for a correctly sized tip or good alignment, and excessive impact can flare the pin, damage the surrounding part, or fracture an attachment.
Drive the Pin Straight: A Controlled Procedure
- Confirm the pin’s direction. Inspect the assembly for a shoulder, taper, peened end, or other feature that determines the removal direction. Do not assume every pin is driven out the same way.
- Support the work. Clamp the part securely and support it close to the pin so impacts do not flex it. Position the pin over a suitable clearance opening when it must exit through the opposite side. Protect finished surfaces.
- Prepare the air supply. Disconnect the tool while fitting the punch. Check the attachment and retainer for cracks, wear, or looseness. Set pressure at the regulator, reconnect, and confirm that the hammer operates within its manual’s limits.
- Seat the punch squarely. Place the tip on the pin’s end, centered rather than riding on its thin outer rim. Keep the punch axis in line with the pin axis. If the tip slips or cants, stop and correct the fit instead of holding it at an angle.
- Use short bursts. Apply a brief tap, release the trigger, and inspect whether the pin has moved straight. Continue with short impacts rather than holding the trigger down. Once the pin begins moving, keep the punch centered and switch to a suitable longer punch if the starter no longer reaches safely.
- Stop if progress changes. If the pin stops, the punch begins to mushroom, or the workpiece shifts, stop and reassess. Check direction, tip size, support, and obstruction. Increasing pressure repeatedly can turn a repairable pin into a damaged bore.
Air Hammer Punch Attachments Compared
| Attachment type | Best use | Tip guidance | Main trade-off |
|---|---|---|---|
| .401-shank starter punch | Starting or loosening a roll pin in a compatible .401-bore hammer | Match the end to the pin; keep it centered | Limited reach as the pin travels |
| .401-shank roll-pin punch | Driving a moving pin farther through an assembly | Choose a pin-compatible tip with appropriate clearance | A wrong size can slip, wedge, or deform the pin |
| .401-shank flat punch | General driving tasks where a flat face is appropriate | Not the first choice for a thin-walled roll-pin end | Uneven contact can flare the pin rim |
| Hand roll-pin punch | Precise work, delicate parts, or final positioning | Use a hand punch sized to the pin | Slower, but offers more direct control |
What Wears, and How to Avoid Repeat Damage
The punch tip and shank are the first places to inspect. Repeated off-center impacts can flatten, burr, or mushroom the tip; a battered shank or worn retainer may no longer hold securely. Stop using an attachment that is cracked, deformed, or loose. Replace damaged consumables rather than grinding a tip into a shape that no longer supports the pin correctly.
After use, disconnect the air supply, wipe the attachment clean, and inspect the retainer and tool nose. Follow the hammer maker’s instructions for lubrication and storage. Keep punches separate from chisels and other attachments so their tips do not knock against each other in a drawer.
Common causes of flared ends are an oversized or flat punch, striking the pin off center, too much pressure, and sustained hammering after the pin has stopped moving. If the pin cannot be driven with modest, controlled impacts, investigate the assembly rather than escalating blindly. A hand punch, pin press, penetrating oil where appropriate, or professional repair may be safer for a valuable or fragile component.
Which Setup Makes Sense?
| Your situation | Practical choice |
|---|---|
| Occasional work, one known pin size | One correctly sized .401-shank starter punch and a matching roll-pin punch, if both are specified for your hammer |
| Several pin sizes | A size-marked set covering the pins you actually encounter; verify every shank and retainer fit |
| Delicate assembly or limited access | Start by hand for alignment, or use hand punches for better control; use the air hammer only if the part is firmly supported |
| Pin is seized or visibly damaged | Stop before the end flares. Confirm removal direction and support, then consider a press or other appropriate method |
The best air hammer roll pin punch is not simply the hardest or largest attachment. It is the one with the correct .401-inch shank and retainer fit, a tip suited to the pin, and enough control to let you start at low pressure and increase only when the setup remains straight.