What's inside
As an Amazon Associate I earn from qualifying purchases. This post may contain affiliate links at no extra cost to you.
Choosing between a ratcheting and non-ratcheting crimper comes down to one question: how consistently can you make a secure crimp? For insulated connectors, a ratcheting crimper is usually the better tool for repeated work, while a non-ratcheting crimper can be perfectly adequate for occasional repairs and light-duty wiring.
The difference is not simply convenience. A poor crimp can leave loose strands, increase electrical resistance, allow moisture into the connection, or pull apart under vibration. The right tool helps you apply pressure in the correct part of the terminal and repeat that result across multiple connections.
As an Amazon Associate we earn from qualifying purchases at no extra cost to you.


Our Top Picks
 Klein Tools 3000CRKIT 5-Piece Ratchet Crimping Tool SetPack of 113.71 x 10.62 x 0.1 inches2.48 poundsCheck on Amazon
 Klein Tools 80013 Klein Tools 80013 Wire Stripper/RatchetingPack of 115 x 10 x 3 inches2.33 PoundsCheck on Amazon

How the Two Crimper Types Work
A non-ratcheting crimper is the familiar hand tool with hinged handles and several die openings. You place the insulated terminal in the correct cavity, insert the stripped wire, and squeeze. Releasing the handles immediately opens the tool, whether or not the terminal has been fully compressed.
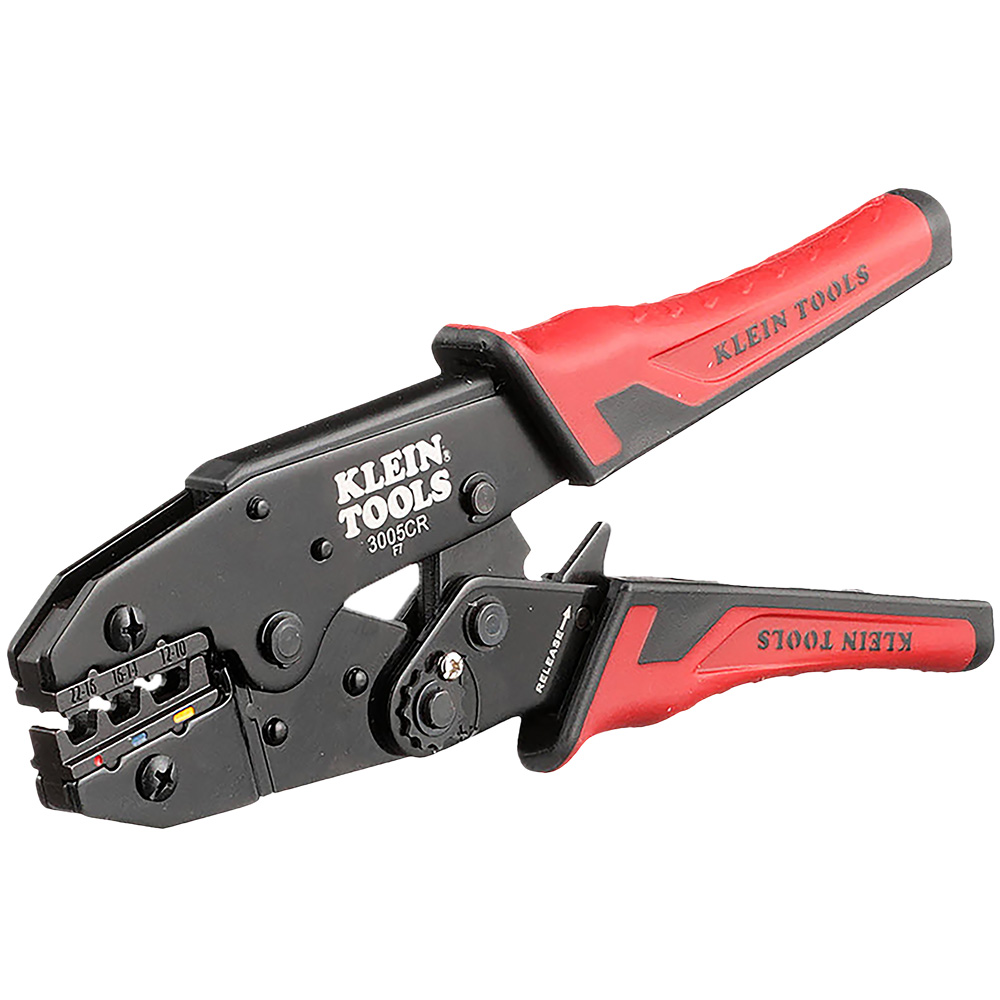
A ratcheting crimper uses a one-way mechanism. The handles stay locked until the crimp cycle reaches its designed stopping point. Most models also include an emergency release, allowing you to open the jaws before completion if you inserted the connector incorrectly.
That ratchet does not magically fix a bad connection. It mainly controls the crimping sequence and limits how far the dies close. You still need the correct die, terminal, wire size, and strip length.
Ratcheting vs Non-Ratcheting Crimpers
| Feature | Ratcheting crimper | Non-ratcheting crimper |
|---|---|---|
| Crimp consistency | High when matched to the terminal | Depends heavily on operator feel |
| Learning curve | Easy after setup, but requires correct die selection | Simple to understand, harder to repeat precisely |
| Speed for multiple terminals | Fast and consistent | Usually slower |
| Cost | Typically $20 to $60 for useful general-purpose tools | Often $8 to $25 |
| Risk of under-crimping | Lower | Higher |
| Best use | Vehicle wiring, control panels, repairs, and repeated work | Occasional household, hobby, or emergency repairs |
Why Ratcheting Usually Wins for Insulated Connectors
Insulated terminals typically have a colored barrel matched to a wire range. Red commonly covers 22–16 AWG, blue 16–14 AWG, and yellow 12–10 AWG, though you should follow the markings on the specific connector. A ratcheting tool makes it easier to produce similar compression on every terminal in that range.
With a non-ratcheting tool, it is easy to squeeze too lightly. The wire may look captured but slide out when pulled. It is also possible to crush the plastic sleeve, cut into the metal barrel, or deform the connector by pressing in the wrong location. These problems are especially common when working overhead or in a cramped vehicle harness.
A quality ratchet tool also gives you a useful tactile signal. You squeeze through the cycle until the mechanism releases. That makes it less tempting to stop halfway because the tool feels tight. For a wiring job involving 20 or 30 terminals, the repeatability is worth more than the small amount of time saved by buying the cheapest tool.
If you regularly install insulated terminals, a ratcheting insulated terminal crimper is the sensible starting point. Look for clearly marked die ranges, a positive ratchet release, and handles that do not flex noticeably under load.
When a Non-Ratcheting Crimper Is Fine
The cheaper option is reasonable if you make only a few connections a year, already know how to judge a crimp, and can test each connection afterward. A basic crimper is also useful as a backup in a toolbox or for temporary low-voltage projects such as speaker wire, hobby electronics, or a simple 12-volt accessory.
It can work well when the tool has properly sized cavities rather than one vague universal slot. Place the terminal in the die so the metal barrel—not the insulated sleeve—is being compressed. Crimp once near the center of the barrel, then pull firmly on the wire. The wire should not move, and the insulation should remain supported without being crushed.
For occasional use, a basic insulated terminal crimper may be all you need. Do not choose it solely because it has many extra functions. Wire cutters, bolt cutters, and stripping holes often add bulk without improving the crimp itself.
Common Crimping Failures
Under-crimping: The terminal looks intact but the wire pulls out with moderate force. This creates an intermittent connection, particularly in vehicles and machinery exposed to vibration.
Wrong cavity: A terminal intended for 16–14 AWG wire may be crushed in a smaller red cavity or barely compressed in a larger yellow one. Match the terminal color and printed wire range to the die marking.
Wrong strip length: Too little bare conductor leaves part of the barrel empty. Too much exposes copper beyond the terminal and can create a short circuit. A practical starting point is to strip only enough for the conductor to reach the far end of the metal barrel without protruding significantly.
Crimping the insulation: The metal barrel needs to grip copper. If the die is placed on the plastic sleeve, the connection can look tight while the conductor remains loose.
Using the wrong connector: A red insulated butt connector is not a substitute for a connector rated for the wire size, current, temperature, and environment. For damp or outdoor locations, adhesive-lined heat-shrink terminals provide better sealing than ordinary vinyl-insulated types.
What to Look for Before Buying
Buy a crimper that matches the terminals you actually plan to use. A tool advertised for insulated terminals is not automatically suitable for open-barrel automotive terminals, coaxial connectors, ferrules, or non-insulated lugs. Those connectors require different die shapes.
For general 12-volt and household low-voltage work, choose a ratcheting tool covering the common red, blue, and yellow insulated terminal ranges. Confirm that the dies press the connector barrel from the correct sides. Some inexpensive tools produce an overly flat crimp; a controlled, centered indentation is generally preferable.
If you are doing only a handful of repairs, spend less on the crimper and more on decent terminals. If you are wiring a trailer, vehicle, boat, or control cabinet, choose a ratcheting tool and keep spare connectors in each wire range. A heat-shrink insulated terminal assortment is a useful upgrade where moisture and vibration are concerns.
How to Check Your Finished Crimp
Inspect the connection before installing it. The terminal should not be twisted, split, or crushed through the insulation. Copper strands should be fully inside the barrel, with no loose strands protruding. Give the wire a firm hand pull; it should stay secure without the terminal sliding on the insulation.
For critical wiring, test electrical continuity and, when practical, perform a pull test against the connector or wire manufacturer’s specifications. A multimeter can confirm continuity, but it will not prove that the connection has adequate mechanical strength. If a crimp fails inspection, cut it off and make a new one rather than squeezing the same terminal again.
For most people, the ratcheting crimper is the better buy because it reduces under-crimping and produces more repeatable results. A non-ratcheting tool remains a sensible low-cost choice for occasional, noncritical work—provided you use the correct die and test every connection.