What's inside
As an Amazon Associate I earn from qualifying purchases. This post may contain affiliate links at no extra cost to you.
Our Top Picks
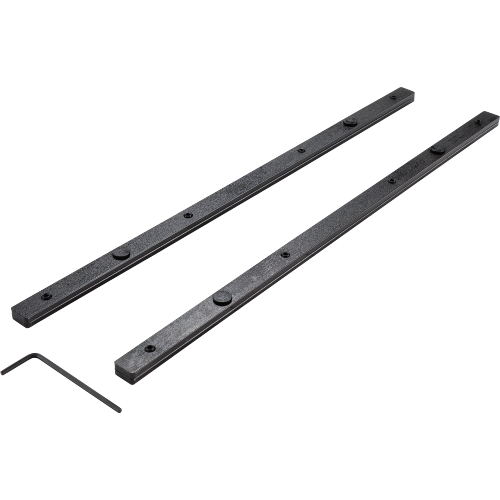
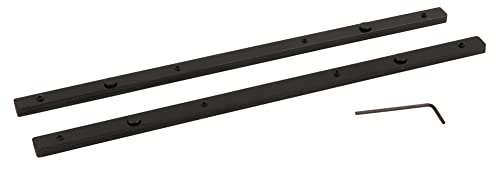
 POWERTEC 71358 Track Saw Guide Rail Connector SetGuide Rail Connector Set12.7 x 1.75 x 0.55 inches0.76 poundsCheck on Amazon

What makes a good track saw rail connector
A rail connector joins two guide rails so a track saw can travel across a sheet longer than either rail. The connector itself is simple: usually an aluminum bar that slides into channels on the underside of the rails and is tightened with screws or cam locks. The difficult part is keeping the rail joint straight, flat, and rigid while the saw crosses it.
For long plywood cuts, the best connector is not necessarily the most expensive one. It must match the rail system, fit tightly without forcing the rails apart, and provide enough adjustment to align the guide edges. A connector that is loose in the channel can leave a visible kink at the joint. A connector that is too tight may prevent the rails from meeting cleanly.
As an Amazon Associate we earn from qualifying purchases at no extra cost to you.


Most rail systems use one of two arrangements: a single wide connector or two narrower connectors installed in parallel channels. Two connectors usually resist twisting better, particularly on long rails or when the saw is pushed quickly. A single connector can work well for occasional cuts and is easier to install, but it gives the joint more opportunity to rotate.
Best choice for most users
For regular sheet-goods work, buy the connector made for your exact rail brand and use two connectors if the manufacturer allows it. A matched set normally has the correct thickness, screw spacing, and channel fit. This is the safest route when you need accurate cuts without spending time filing or shimming parts.
Start by checking the rail’s underside. Some rails have one connector slot; others have two. The connector must slide into the slot without binding and should not bottom out before it clamps the rail. If your rails are from a less common system, measure the channel width and depth before ordering a universal part. Search by the rail brand and rail series rather than simply searching for “track saw connector.”
For a general-purpose purchase, compare track saw rail connector kits that include the required screws or locking hardware. Kits are usually better value than buying loose bars, and they reduce the chance of using the wrong fastener.
Connector types compared
| Connector type | Best use | Advantages | Limitations |
|---|---|---|---|
| Brand-matched single connector | Occasional long cuts | Simple, inexpensive, normally guaranteed to fit | More vulnerable to twisting at the joint |
| Brand-matched two-connector set | Frequent plywood and cabinet work | Stiffer joint and better resistance to rotation | Costs more and takes longer to install |
| Universal connector | Older, mixed, or discontinued rail systems | Can solve compatibility problems and cost less | May need adjustment, shims, or careful fitting |
| Long replacement rail | Maximum accuracy with minimal setup | No center joint to cross or align | Higher price, harder storage, and more awkward transport |
The cheaper single connector is fine when the cut is rough, the rail is short, or you are trimming shelving that will be cut again. It is also adequate if you clamp the rails to a stable work surface and take care not to press sideways on the saw. Spend more on a two-connector setup when you cut cabinet panels, doors, countertops, or expensive veneer plywood where a wandering joint creates waste.
How to align the rails correctly
Lay the rails on a flat surface with their splinter strips facing down. Slide the connector into the channels of one rail, but leave the clamping screws loose. Bring the second rail into position and slide it onto the exposed connector. Push both rails together until the ends meet with no visible gap.
Alignment is easier if you use the rails’ top edges as a reference rather than relying only on the rubber splinter strips. Place a straightedge across the joint at several points. If the straightedge rocks, loosen the connector and correct the angle before tightening. On a two-connector system, tighten the screws alternately in small increments. Tightening one end fully first can pull the rails out of line.
Do not assume the splinter strips are perfectly aligned just because the aluminum rails are. The strips can shrink, move, or be trimmed slightly differently. Run the saw across the joint on a scrap piece first. If the saw bumps or the cut changes direction at the joint, stop and realign it rather than trying to force the saw through.
Common failure modes
The most common problem is a small kink at the rail joint. It usually comes from a loose connector, uneven tightening, or debris in the channel. Sawdust under the rail can also lift one side enough to change the cut. Clean the channels and wipe the rail bottoms before assembly.
A second problem is a step between the rail surfaces. This can catch the saw base and leave a short mark in the cut. A damaged rail end, bent connector, or over-tightened screw is often responsible. Inspect the rail ends before joining them; if an end is burred, remove only the burr with a fine file. Do not file the guide edge or enlarge the connector channel.
Rails can also separate during the cut if they are not supported. Put the joint over the plywood rather than over a gap in the workbench, and support both rails along their length. Clamp the rail near, but not directly over, the connector if the manufacturer permits it. A clamp positioned on the joint can interfere with the saw or push the rails out of alignment.
When a long rail is better
If you routinely cut full 4-by-8-foot sheets, a single long rail is the most reliable option. It removes the center joint and makes setup faster. The trade-offs are storage, shipping cost, and the risk of bending the rail during transport. A long rail is especially worthwhile for repeated cabinet production, where saving several minutes on every sheet adds up.
For most home workshops, connected shorter rails offer better flexibility. Two rails can handle 48-inch crosscuts, 96-inch rip cuts, and smaller parts without requiring a dedicated storage rack. If that is your situation, look at two-pack guide rail connectors for your rail system.
Buying checklist
Confirm the rail brand, series, number of underside channels, and connector dimensions before ordering. Check whether the kit includes locking screws, cam locks, or a hex key. Prefer a connector with positive clamping hardware over a plain bar that relies on friction alone.
If accuracy matters, buy a matched connector set rather than the absolute cheapest universal option. If you only need to make a few long cuts in construction plywood, a single compatible connector is usually enough. Keep the rails clean, align them on a flat surface, and test the joint on scrap before cutting the good sheet. Those steps matter more than a small difference in connector price.