What's inside
As an Amazon Associate I earn from qualifying purchases. This post may contain affiliate links at no extra cost to you.
A wheel marking gauge and a pin marking gauge both set a line parallel to an edge, but they cut it differently. A wheel gauge rolls a small circular blade along the wood; a pin gauge drags a pointed spur through it. For most clean layout lines, especially across the grain, a sharp wheel has the edge. A pin gauge remains a practical, often cheaper choice for rough work and long-grain marking.
As an Amazon Associate we earn from qualifying purchases at no extra cost to you.


Our Top Picks
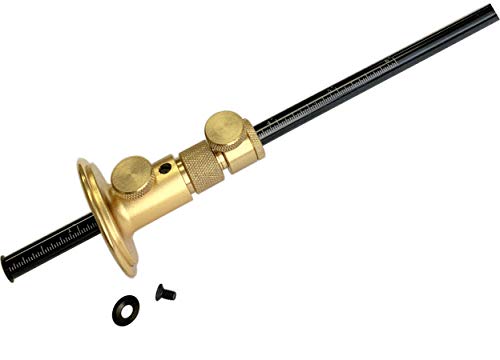
 Woodpeckers Wheel Marking Gauge With Micro Adjust1 Count (Pack of 1)8 x 4.5 x 2.3 inchesCheck on Amazon

How the cutters affect the line
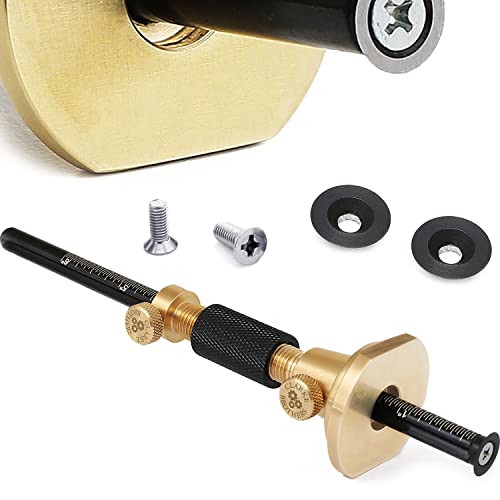
A wheel gauge scores a narrow line with a circular cutter. Because the blade slices rather than plows, it tends to sever fibers cleanly and leaves a visible, shallow kerf. That matters when marking across the grain: a pin can catch and lift fibers ahead of its point, leaving a ragged line or a small splinter at the end of a stroke.
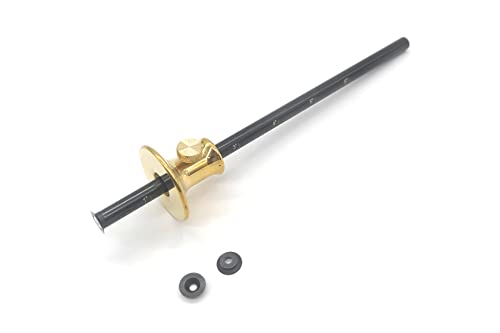
A pin gauge uses a sharp steel point. It is simple and can make a fine line in the direction of the grain, but the point follows the fibers. Across the grain, it may tear them instead of cutting them. A blunt pin makes this worse, and pressing harder is not a fix; it can deepen the tear or push the gauge off course.
Neither tool guarantees a perfect line. Grain direction, sharpness, wood species, and pressure all matter. On soft, open-grained wood, even a wheel can track unevenly. On hard wood, a dull cutter may burnish or skid rather than cut.
At a glance
| Factor | Wheel marking gauge | Pin marking gauge |
|---|---|---|
| Line across the grain | Usually cleaner; slices fibers | More likely to tear or lift fibers |
| Line with the grain | Clean, but can follow grain if pushed carelessly | Often works well when the pin is sharp |
| Cut depth | Controlled by light pressure and blade condition | Easy to overdrive the point |
| Maintenance | Wheel needs to stay sharp and turn freely | Pin needs a keen point and occasional adjustment |
| Best fit | Joinery, cross-grain layout, and precise knife-like scoring | Basic layout, rough work, and budget-conscious use |
Accuracy depends on setup, too
The cutter is only part of the result. A gauge with a fence that rocks, a loose beam, or a lock that slips can ruin a line regardless of whether it has a wheel or pin. Before marking, lock the setting and test it on scrap. Measure from the fence to the cutter at both ends of the head; if the distance changes, the beam may not be seated squarely.
For repeatable work, keep the fence flat against a straight reference edge and use several light passes instead of one hard pull. A useful starting point is one or two light passes, then a final pass with just enough pressure to make the line easy to see. The exact depth depends on the job: a shallow score for a visible layout line, a little deeper if the mark will guide a chisel or saw. Avoid cutting so deeply that the line becomes a damaged edge.
Direction matters with a pin. If the grain pulls the point away from the fence, change the stroke direction or take a lighter pass. On a wheel gauge, check that the cutter rotates freely; a stuck or chipped wheel can scrape, skip, or leave a wider mark than intended.
Which one should you buy?
Choose a wheel gauge if you regularly mark shoulders, tenons, dovetail baselines, or other joinery where a clean cross-grain score helps the cut start accurately. It is also the better pick if you often work with brittle or figured stock that frays under a pin. Look for a secure fence lock, a wheel that turns without wobble, and a cutter you can sharpen or replace. Compare wheel marking gauges by their locking mechanism and cutter design, not just by appearance.
A pin gauge is fine if you mark mostly along the grain, work on construction or shop projects where a slightly rough score is acceptable, or only need a gauge occasionally. It has fewer moving parts, and a good sharp pin can make a very fine line. If the point dulls, it can often be touched up, but do not assume a low price is a bargain if the fence slips or the pin is poorly aligned. For occasional use, basic pin marking gauges are often sufficient.
If you can only buy one and do furniture or cabinet joinery, a wheel gauge is the safer general recommendation. If your work is rougher and the gauge will spend most of its time marking with the grain, the cheaper pin type can do the job. A wheel does not make a careless setup accurate, and a pin is not automatically unusable across the grain; it simply demands a sharper point and lighter, more deliberate strokes.
How to get the cleanest line
Start with a clean, straight reference edge. Set the gauge from that edge rather than from a rounded or damaged corner, then test the setting on scrap of the same species if possible. Keep the fence pressed evenly against the work, and pull the tool steadily without twisting the beam. If the line wanders, check the reference edge and fence contact before blaming the cutter.
For cross-grain work with a pin gauge, make a shallow first pass and avoid forcing the point through earlywood and latewood bands. A sharp wheel usually needs less effort, but it can still skid if you start abruptly or push too hard. When a line is critical, use the gauge to establish the location and inspect it under good light before cutting. The cleanest layout line comes from a sharp cutter, a stable fence, and controlled pressure—not from spending more on the tool alone.