What's inside
As an Amazon Associate I earn from qualifying purchases. This post may contain affiliate links at no extra cost to you.
Between studs, inside joist bays, and behind plumbing stacks, you hit the same problem: a standard drill is too long to get a bit square to the work. The two common fixes are a dedicated right-angle drill or a low-cost offset attachment for a drill you already own. They look like they solve the same problem, but they behave very differently when you are actually drilling studs and driving structural screws overhead.
As an Amazon Associate we earn from qualifying purchases at no extra cost to you.


Our Top Picks
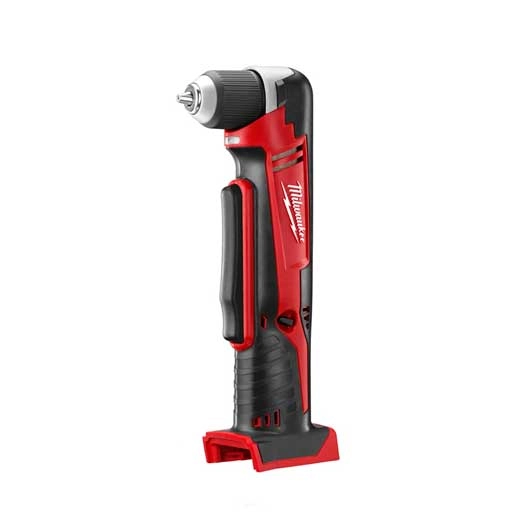
 Milwaukee 2415-20 M12 12-Volt Lithium-Ion Cordless Right AngleMedium0 x 0 x 0 inches2.23 poundsCheck on Amazon
 DEWALT Impact Ready 1.5 in Right Angle Drill1 Count (Pack of 1)3.9 x 1.88 x 8.75 inches0.3 poundsCheck on Amazon


What each tool actually does
A right-angle drill is a purpose-built drill with the chuck set at 90 degrees to the motor housing. The head is geared down, so you get high torque at lower RPM. A corded Milwaukee-style close-quarter head measures about 3.5 to 4 inches from the back of the head to the tip of a stubby bit. Cordless 18V right-angle drills are bulkier, typically 4 to 5 inches deep and 12 to 14 inches long overall.
An offset attachment is a small right-angle gearbox that chucks into your existing drill or impact driver. The most useful type for framing is the offset head, where the output is shifted about 0.75 to 1.5 inches off the input axis. That lets you tuck the whole assembly flat against a stud. Total clearance can be as little as 1.5 inches in front of the stud face when used with a short 1-inch bit, which is tighter than any dedicated right-angle drill can manage. The trade-off is that it is two chucks and a set of small bevel gears away from your drill’s power.
Headroom and reach in framing bays
Tight framing is usually a 14.5-inch bay between studs or a 16-inch on-center joist cavity, often with pipes, wires, or blocking in the way. You rarely need to drill in the center of the bay; you need to drill near the edge, tight to the stud, at joist hangers, or inside corners.
A right-angle drill wins on reach and stability. The long body acts as a handle, letting you keep the bit square with two hands while you lean into it. You can drill a 7/8-inch hole through doubled studs or drive a 3-inch structural screw without the tool twisting out of your hand. In a 14.5-inch bay, you can comfortably drill joists from the face when you have at least 4 inches of clearance in front of the joist.
An offset attachment wins when you have almost no clearance. If you are drilling inside a wall cavity that already has drywall on one side, or between a header and a tight joist where you have less than 3 inches total, the right-angle drill simply will not fit. The offset head on a compact drill or driver will. The downside is control. The attachment adds 3 to 4 inches of flex and you are driving it through your drill’s chuck, which introduces runout. Keeping a 1-inch auger bit from wandering is much harder, and you cannot apply much side load without binding.
Torque, power, and bit choice
Right-angle drills are geared for torque. A typical 18V model delivers 350 to 500 in-lbs at 0-800 RPM on the low range, which is enough to turn a 1-inch self-feed bit through SPF studs without stalling if you keep the bit sharp. Corded models run slower, around 0-400 RPM, but will pull a 1-1/2-inch self-feed bit all day.
Offset attachments are not geared for torque the same way. They are usually 1:1 or slightly geared up, and the small gears are the weak point. Manufacturers often rate them for 60 to 120 in-lbs max and 1,500 RPM max. That limits you to smaller bits: 3/4-inch spade or auger bits, short step bits for steel, and screw driving up to #10 or #12. Push a 1-inch auger into engineered lumber or old Douglas fir with an attachment and you will either stall your driver or strip the attachment’s gears. Heat is also an issue. Run an offset head continuously for five or six large holes and the grease thins out, backlash increases, and the head gets noticeably hot.
For fasteners, attachments work best with an impact driver on low setting and with 1-inch and 6-inch offset-rated bits. A standard drill in screw mode gives you better feel and less hammering on the gears. Dedicated right-angle drills handle structural screws and ledger screws directly with a socket or hex adapter and no loss.
Side-by-side comparison
| Feature | Right-Angle Drill | Offset Drill Attachment |
|---|---|---|
| Minimum front clearance needed | 3.5 – 5 inches | 1.5 – 2.5 inches with stubby bit |
| Usable bit size in wood | Up to 1-1/2 inch self-feed | Reliably up to 3/4 inch; 1 inch max, short bursts |
| Torque handling | 350 – 600 in-lbs, geared down | 60 – 120 in-lbs rated, gears strip above that |
| Control / bit wander | Good, two-hand grip, low runout | Fair, flex and runout increase with length |
| Durability under load | Built for continuous drilling | Light-duty; gears and bearings wear fast with large bits |
| Cost | $140 – $280 bare tool | $20 – $55 |
| Best for | Repetitive holes, joist and stud drilling, structural screws | Occasional tight-spot screws and small holes where nothing else fits |
Failure modes and durability
The way each tool fails tells you a lot about where to use it.
Right-angle drills fail at the chuck and the elbow housing. Overload them with a dull self-feed bit and you will smoke the clutch or round the hex of the bit. The head will also get hot and the gears will howl if you run it at high speed under load. But with sharp bits and the correct speed range, they last years on framing crews.
Offset attachments fail at the internal bevel gears and at the 1/4-inch hex shank. The shank rounds or snaps where it meets the housing, especially on impacts. The gears strip if you lean into a large auger that catches and kicks. The set screw that holds the housing together loosens with vibration, which adds wobble. If you feel the attachment clicking or jumping under light load, stop. That is a tooth skipping. One more heavy pull and it is done. Keep these heads clean, keep speed low, and use a drill rather than an impact for holes over 1/2 inch.
Speed and productivity
If you have 20+ holes to drill for running wire or sistering joists, a right-angle drill is faster even if it is heavier to get into place. You set up once, drill straight, and move on. Bit changes are quicker with a real keyless chuck, and you can use full-length auger bits that clear chips better.
An offset drill attachment is faster for two or three screws in a terrible spot. You keep it in your pouch, pop it in your impact driver, drive the fasteners, and take it out. Where it slows you down is chip clearing and bit length. Most attachments require 1-inch or 2-inch bits, which clog quickly in deep stud packs. You end up pulling out to clear chips far more often.
Which should you buy
Buy the right-angle drill if you do recurring framing, plumbing, or electrical rough-in. If you need to drill 3/4-inch holes for 1/2-inch PEX, pull 1-inch holes for wire, or drive ledger and joist-hanger screws inside bays, it is the only option that will hold up without constant gear anxiety. The corded version is still the most compact and torque-dense if you have power. Cordless makes sense if you are on ladders or in remodels without temp power.
The cheaper option is fine if you already own a good drill or impact and only hit a tight bay occasionally. An offset attachment will get you out of trouble when you need to add a screw to a hanger, drill a 1/2-inch hole for a retrofit wire, or drive a screw behind a pipe where a right-angle drill cannot physically fit. Think of it as a specialty adapter, not a replacement. Get one with replaceable 1/4-inch hex bits and a solid bearing support, not the cheapest cast housing with no brand support. Keep expectations low on hole size and do not use it for production drilling.
If you do both kinds of work, owning both is not redundant. Use the right-angle drill as your primary and keep the offset head in your bag for the one bay per job where even the right-angle head is too tall. That combination covers everything from open stud drilling to the final screw behind a waste stack without forcing a bit at an angle and splitting the framing.