What's inside
As an Amazon Associate I earn from qualifying purchases. This post may contain affiliate links at no extra cost to you.
Best Cordless Right-Angle Drill for Running Plumbing Through Floor Joists
Running water lines through floor joists is a job where the drill’s shape matters as much as its power. A standard drill often will not fit between joists and the subfloor, especially when you are drilling near a wall or working below an existing floor. A cordless right-angle drill gives you the clearance to bore straight through the joist while keeping the battery and motor out of your way.
The best choice is usually a compact, high-torque model with a 1/2-inch chuck, a mechanical clutch, and a brushless motor. You do not necessarily need the most powerful hole-hawging drill available. The right tool depends on the hole size, the number of joists, and whether you are using a standard bit, self-feed bit, or hole saw.
As an Amazon Associate we earn from qualifying purchases at no extra cost to you.


Our Top Picks
 DEWALT 20V MAX* XR Brushless Cordless 7/16 in.One Size5.5 x 18.5 x 8.7 inches10.58 PoundsCheck on Amazon
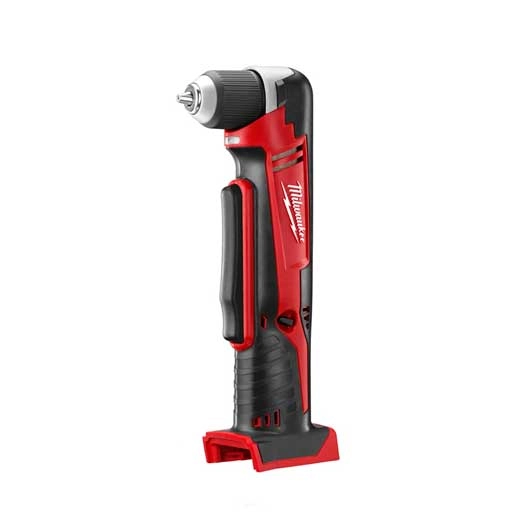
 Milwaukee 2415-20 M12 12-Volt Lithium-Ion Cordless Right AngleMedium0 x 0 x 0 inches2.23 poundsCheck on Amazon


What to Look For
Torque and gearing: Plumbing holes commonly range from 3/4 inch to 2-1/2 inches. A small compact right-angle drill can handle ordinary twist bits and smaller self-feed bits, but it may stall or kick hard with a 2-inch bit. For repeated holes in framing lumber, look for a model marketed for high-torque drilling, preferably with two mechanical speeds. Low speed gives better control and reduces shock loads.
Chuck size: A 1/2-inch chuck accepts larger shanks and is the safer choice for plumbing work. Many self-feed bits and hole saw arbors use 7/16-inch or 1/2-inch shanks. A 3/8-inch chuck can be adequate for small copper or PEX holes, but it limits your bit selection and is easier to overload.
Clutch or anti-kickback protection: A clutch is important when a bit catches. Without one, the drill can rotate around the bit and smash your wrist against a joist or nearby pipe. Electronic kickback control is useful, but it does not replace good technique. Keep both hands on the tool when possible and stand out of the drill’s rotation path.
Head length and clearance: A shorter head is valuable in cramped floor systems. Compare the tool’s front-to-back length, not just its advertised voltage. Some powerful models have long gear housings that make them awkward between joists. A compact 18V or 20V drill may be easier to position than a larger 24V or 36V machine.
Battery size: A 4.0Ah or 5.0Ah battery is a practical middle ground. A smaller 2.0Ah pack reduces weight but may run out during a long series of holes. Large 8.0Ah packs provide more runtime but can make an already awkward tool tiring. If you already own batteries in a professional cordless system, staying on that platform is often worth more than chasing a small difference in specifications.
The Best Cordless Right-Angle Drill Types
| Drill type | Best use | Advantages | Limitations |
|---|---|---|---|
| Compact right-angle drill | PEX, copper, small wood bits, occasional repairs | Light, maneuverable, usually less expensive | May struggle with holes over 1-1/2 inches |
| High-torque right-angle drill | Repeated holes and larger self-feed bits | More capacity, better low-speed control | Heavier and more expensive; greater kickback risk |
| Stud-and-joist drill | Large holes through framing | Strong gearing, handles aggressive bits | Often bulky in tight spaces |
| Compact drill with flexible shaft | Very restricted access and light-duty holes | Can reach spaces a right-angle head cannot | Slower, less rigid, poor choice for large holes |
For most homeowners and remodelers, a compact high-torque right-angle drill is the useful middle ground. It can handle common plumbing work without the weight and price of a specialized stud-and-joist machine. If you are drilling dozens of 2-1/8-inch holes for drain lines, step up to a dedicated cordless high-torque right-angle drill.
Bit Selection and Technique
Use the bit made for the material and hole size. A standard twist bit is appropriate for small holes in thin metal or wood, but it is inefficient in thick joists. Self-feed bits cut quickly in wood, while hole saws leave a cleaner opening for larger lines. Auger bits work well in framing but can pull the drill forward aggressively when the lead screw bites.
For a typical 1-inch PEX line, a 1-1/4-inch hole gives useful clearance without removing excessive wood. A 2-inch waste line may require a larger hole, but the size must be checked against local framing rules and the joist manufacturer’s requirements. Never enlarge a hole just because the bit is available.
Start at low speed and let the bit cut. Excessive pressure overheats the bit, drains the battery, and increases the chance of a stall. Withdraw the bit occasionally to clear chips, particularly when drilling thick lumber with a self-feed or auger bit. If the drill begins to bind, release the trigger immediately rather than trying to muscle through.
Joist Safety and Plumbing Layout
Before drilling, locate electrical cables, existing pipes, ductwork, and fasteners. A stud finder is not reliable through every floor assembly, so inspect from both sides when possible. Drill through the center area of the joist, keep holes aligned, and avoid notching the top or bottom edge. Those edges carry much of the joist’s bending strength.
Building codes commonly restrict hole size and placement in solid-sawn joists, and engineered I-joists have separate rules. An I-joist’s web may allow specific hole sizes only in approved zones. Do not drill the top or bottom flange. If a hole is too close to an edge or too large, the fix may require a structural repair—not simply a metal plate.
Install nail plates wherever a pipe or cable passes close enough to the surface that a future screw or nail could reach it. A hole through the center of a joist usually does not need a plate for that reason, but local rules and the actual installation still control.
When a Cheaper Drill Is Fine
A less expensive compact right-angle drill is perfectly reasonable for a bathroom remodel involving a few holes under 1-1/4 inches. If you already have compatible batteries and will use the tool only occasionally, paying for extreme torque may buy weight rather than useful performance. In that situation, a compact cordless right-angle drill is enough.
Spend more when you regularly drill large holes, work in dense older lumber, or need the tool to survive daily use. A 1/2-inch chuck, metal gear housing, two-speed transmission, and electronic overload protection matter more than a high no-load RPM number. Pair the drill with sharp bits, a fresh battery, and careful layout; those choices prevent more failures than extra voltage alone.