What's inside
As an Amazon Associate I earn from qualifying purchases. This post may contain affiliate links at no extra cost to you.
Our Top Picks
 DEWALT 20V MAX* XR Brushless Cordless 7/16 in.One Size5.5 x 18.5 x 8.7 inches10.58 PoundsCheck on Amazon
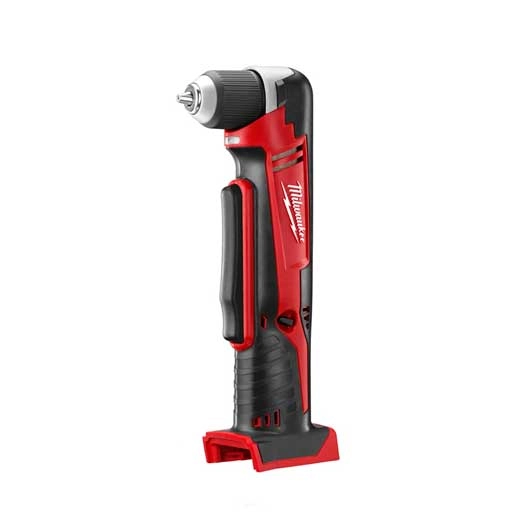
 Milwaukee 2415-20 M12 12-Volt Lithium-Ion Cordless Right AngleMedium0 x 0 x 0 inches2.23 poundsCheck on Amazon


Quick pick: choose reach before power
For boring a typical 2-by-4 stud bay, a compact 18V or 20V right-angle drill is the best all-around choice if you already own its battery platform. It has enough torque for common plumbing holes, and its head is much easier to maneuver than a standard drill with a bulky chuck. If you are drilling many holes, working in engineered lumber, or using large self-feed bits, step up to a high-torque model with a side handle. For one short run of small supply lines, a corded right-angle drill or a rental can be the cheaper, sensible answer.
Before buying, measure the clearance where the drill head and bit must sit. A tool advertised as “compact” can still be too tall to fit between pipes, a tub, or the back of a cabinet. Check the tool’s head height, not just its overall length, and allow room to change bits.
As an Amazon Associate we earn from qualifying purchases at no extra cost to you.


Right-angle drill types compared
| Type | Best for | Trade-off | What to check |
|---|---|---|---|
| Compact cordless | Occasional holes in standard studs; tight access | Less runtime and torque than heavy-duty models | Head clearance, chuck capacity, battery platform |
| High-torque cordless | Repeated large holes and demanding bits | Heavier; can be harder to control in a cramped bay | Side handle, clutch or anti-rotation control, weight |
| Corded right-angle drill | Long sessions near an outlet or a one-off project | Cord can snag; outlet access limits use | Speed control, cord routing, listed duty rating |
| Right-angle attachment | Light-duty work with a compatible drill | Not a substitute for a dedicated tool under heavy load | Manufacturer’s torque limits and chuck compatibility |
What to buy for plumbing holes
For copper or PEX lines through ordinary wood studs, a compact cordless right-angle drill is usually the easiest tool to live with. Look for a keyed or keyless chuck that accepts your largest intended bit, a variable-speed trigger, and a low-speed setting that is controllable rather than merely fast. A 3/8-inch hole for a small line is a very different load from a 1-1/2-inch hole made with a self-feed bit. The larger bit needs more torque and can grab suddenly.
If you need a dedicated tool, compare compact cordless right-angle drills by head dimensions, bare-tool weight, and included handle—not by voltage alone. Battery voltage is a poor shortcut for comparing torque across brands. A familiar 18V or 20V platform is often the better buy than a slightly stronger tool that requires a new battery system.
For many large holes, choose a higher-torque model and use the included auxiliary handle. It adds leverage and helps keep the drill from twisting your wrist if the bit binds. A high-torque right-angle drill with a side handle is overkill for a few small holes, but worthwhile when the work is repetitive. Do not assume more torque makes a tight bay easier: a heavier drill may be difficult to position and hold square.
Bit choice and clearance matter
Use a bit suited to the material and hole diameter. Auger bits clear chips well in framing lumber, while self-feed bits cut quickly but demand more torque and can catch hard. Hole saws are useful for larger openings, but they leave a core and may bind if packed with chips. Keep the bit sharp; a dull cutter increases heat, stalls, and the force needed to control the drill.
Check the bit’s overall length as well as its diameter. In a narrow bay, a long bit may hit an adjacent pipe or wall before its cutting edge reaches the stud. A short bit can improve control, but it may not reach through a thick stud from the available angle. Dry-fit the tool with the bit installed, battery attached, and side handle in place before drilling.
Bore safely and keep holes in bounds
Locate existing wiring and pipes before cutting. Use an appropriate scanner, inspect both sides where possible, and turn off power when working near concealed electrical runs. A stud finder cannot guarantee that a bay is clear. If you are drilling into finished framing with unknown services, open the wall or use a cautious inspection method rather than trusting one tool reading.
For a typical 1-1/2-inch-wide wood stud, keep the edge of a hole at least 5/8 inch from either edge; larger holes may require protection plates where required by local code. Follow the applicable plumbing and building rules for hole size and placement, especially in load-bearing framing and engineered I-joists. Do not notch or bore engineered members using ordinary stud rules.
Hold the drill firmly with both hands when the tool permits, keep your body out of the likely kickback path, and start slowly. Let the cutter work instead of leaning hard on it. If the bit stalls, release the trigger before backing it out; forcing a spinning bit can damage the work or wrench the tool. Clear chips periodically, and stop if the bit meets metal or an unexpected obstruction.
When a cheaper option is enough
A right-angle attachment can be economical for a few small holes if the drill manufacturer allows the combination and the attachment is rated for the load. It adds length at the head and can reduce control, so it may fail the very clearance test that prompted the purchase. Avoid using a lightweight attachment with a large self-feed bit unless its maker explicitly rates it for that work.
If you only need to make a handful of holes, renting a dedicated right-angle drill is often better than buying a heavy-duty tool that will sit unused. A corded model is also a reasonable low-cost choice when you have a nearby outlet and can keep the cord clear of the bit and work area. For regular plumbing or remodeling work, cordless is more convenient; for occasional light drilling, the cheaper option is fine.