What's inside
As an Amazon Associate I earn from qualifying purchases. This post may contain affiliate links at no extra cost to you.
Our Top Picks
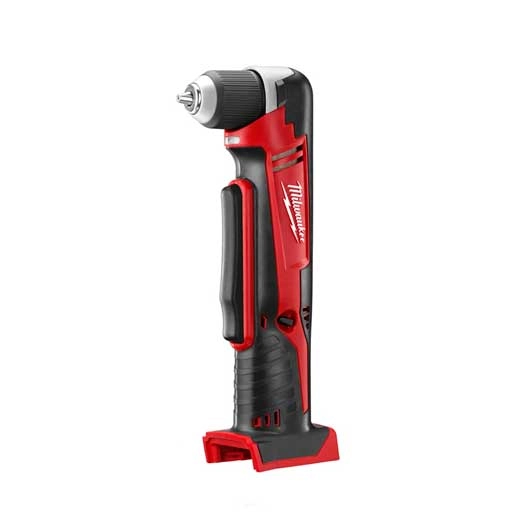
 Milwaukee 2415-20 M12 12-Volt Lithium-Ion Cordless Right AngleMedium0 x 0 x 0 inches2.23 poundsCheck on Amazon
 DEWALT Impact Ready 1.5 in Right Angle Drill1 Count (Pack of 1)3.9 x 1.88 x 8.75 inches0.3 poundsCheck on Amazon
 DEWALT FLEXTORQ Lighted Modular Right Angle Attachment forOne Size7 x 4.2 x 1.4 inches0.53 PoundsCheck on Amazon


What works in a confined cabinet
A right-angle drill attachment can get a bit behind a cabinet stile or shelf where a regular drill will not fit. It does not make the drill itself smaller, though: the drill body, attachment head and bit all need room to line up. For a typical 1/2-inch plumbing or cable hole, the attachment can be a practical fix. For large holes in hardwood, repeated work or a space so tight you cannot hold the drill square, a dedicated right-angle drill is usually the better tool.
For occasional drilling in plywood, softwood or cabinet components, start with a compact, geared attachment that matches your drill’s chuck and rated capacity. A right-angle drill attachment is the low-cost route when you already own a suitable drill. If the job involves frequent large holes, compare it against a dedicated right-angle drill, which is designed to put the motor and handle in line with the work.
As an Amazon Associate we earn from qualifying purchases at no extra cost to you.


Attachment versus dedicated right-angle drill
| Option | Best use | Main trade-off |
|---|---|---|
| Compact right-angle attachment | Occasional holes in wood, plastic or thin metal | Uses your existing drill, but adds length and another connection that can flex or loosen |
| Geared attachment with a side handle | More torque or larger bits, if the drill and attachment are rated for the load | Better control, but bulkier and still not as integrated as a dedicated tool |
| Dedicated right-angle drill | Repeated holes, larger self-feed bits and regular work in framing or cabinets | Costs more and takes up storage space, but is more controllable under load |
| Short bit or right-angle bit holder | Screws and small pilot holes with very little clearance | Not a substitute for a drill attachment when boring holes with larger bits |
Attachments vary in chuck style and capacity. Check whether the unit accepts your drill’s chuck, whether it has its own 3/8-inch or 1/2-inch chuck, and the maximum bit size listed by its maker. Do not assume a small attachment can handle a hole saw or large self-feed bit just because the drill can. The attachment’s gears, spindle and housing may be the limiting parts.
Check the fit before buying
Measure the gap from the cabinet side to the center of the hole, then measure the attachment’s head depth and the length of the bit behind its cutting edge. You need room not only for the head but also for your hand and a straight approach. A right-angle head that fits into a 2-inch gap may still be unusable if the drill body hits a drawer runner or cabinet back before the bit reaches the mark.
Look at the attachment’s overall profile, not just its advertised head height. A standard drill chuck can add several inches behind the attachment, and a long bit can push the drill farther out. If clearance is marginal, test the arrangement with the actual bit installed before committing. A short bit may solve the problem; a longer bit may be necessary if the attachment head cannot reach past an obstruction.
Also check rotation and speed compatibility. Some attachments are intended for drills, not impact drivers. Do not use one with hammer mode, and avoid impact-driver use unless the attachment specifically allows it. Impact pulses can damage gears or loosen the connection. Use the drill’s low gear for larger bits and keep the clutch or torque setting appropriate to the work.
Boring without damaging the cabinet
Mark the hole center and clamp a scrap block behind the panel if you can reach the back. That backing reduces breakout when the bit exits. For a visible cabinet face, drill from the finished side until the center point just appears on the reverse, then finish from the back. This is slower than pushing straight through, but it leaves a cleaner exit edge.
Start at low speed with light pressure. Keep the attachment square to the surface; because the drill is offset, it is easy to let the head tilt as the bit bites. For a hole around 1/2 inch in plywood, a sharp twist bit or brad-point bit is usually manageable. Larger holes and tougher wood place much more strain on the gearing. Withdraw the bit periodically to clear chips, especially in a deep hole, where packed waste can overheat the bit and stall the drill.
Hold the drill with both hands when possible and keep your wrist out of the bit’s line of rotation. A sudden bind can jerk the drill even at low speed. Do not brace the attachment against a cabinet edge unless the manufacturer provides a suitable handle or the work is securely clamped. If the tool begins to chatter, the head gets hot, or the drill stalls repeatedly, stop and reduce the bit size or switch to a more capable tool.
Which option makes sense?
For a few small holes in cabinet plywood, a basic geared attachment is often enough. It is the cheaper choice if you already own a drill, and the added setup is acceptable for a short job. A side handle is worthwhile if you expect to drill near the attachment’s capacity, since it gives you more control when a bit catches.
Choose a dedicated right-angle drill for frequent work, large holes, or any task where a stalled bit could damage a finished cabinet. Its compact head and integrated grip are easier to position than a drill-plus-attachment combination, and the tool is generally better suited to sustained boring. It is not automatically the answer for every tight space: check the actual head dimensions, because some dedicated drills are too bulky for narrow cabinet cavities.
If neither option can fit squarely, do not force the setup. Move the hole if the cabinet design allows it, remove a drawer or panel, or use a short flexible extension only for small pilot holes or screws. For a large bore, a flexible extension is a poor substitute: it can wander, twist under load and leave an oversized or angled hole.