What's inside
As an Amazon Associate I earn from qualifying purchases. This post may contain affiliate links at no extra cost to you.
Our Top Picks
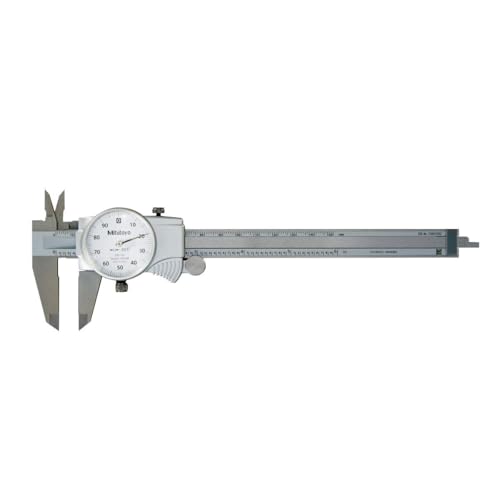 Mitutoyo 505-742J Dial Caliper10.6"L x 4.5"W x 1.4"H10.6 x 4.5 x 1.4 inches0.01 PoundsCheck on Amazon

Short answer: choose for the measurement
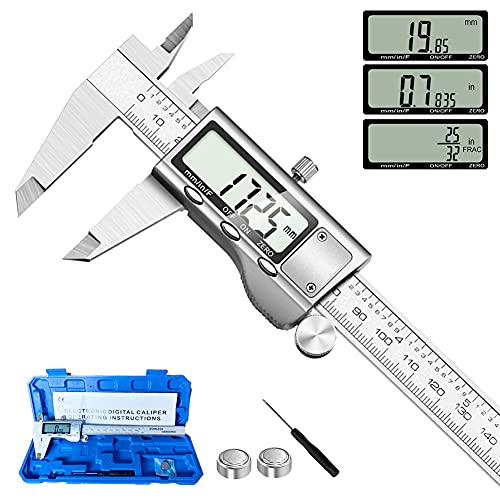
For most woodworking layout, a vernier caliper is the more practical choice. It has fewer moving parts, is usually less expensive, and is plenty precise for checking stock thickness, hardware, dowels, and small cutoffs. A dial caliper is quicker to read at a glance, especially when taking several measurements in a row, but its pointer and rack add parts that can get damaged or clogged with shop dust.
Neither tool replaces a rule, square, or marking gauge for laying out lines on a board. Calipers are best for measuring dimensions and transferring a measured opening; their value is in making repeatable checks, not in marking long, visible lines.
As an Amazon Associate we earn from qualifying purchases at no extra cost to you.


What each caliper measures
Both tools use opposing jaws to measure outside dimensions, inside jaws to measure openings, and a depth rod to check hole depth or a recess. On common inch models, the main beam is graduated in 1/16-inch or 1/10-inch increments, while the moving scale resolves the gaps between those marks. Many woodworking tasks do not need the finest available reading, but consistent measurement matters when fitting parts.
A vernier caliper has a small auxiliary scale that slides along the beam. You find the last main-scale mark before the vernier zero, then identify which vernier line aligns with a line on the beam. A dial caliper turns rack movement into a pointer reading on a round face. That is faster to scan, but the dial does not make the tool inherently more accurate.
At-a-glance comparison
| Factor | Vernier caliper | Dial caliper |
|---|---|---|
| Reading speed | Slower; requires aligning scale marks | Faster; pointer is easy to scan |
| Moving parts | Few; sliding beam and jaws | More; includes rack, pinion, and dial |
| Dust tolerance | Generally better, though the beam still needs cleaning | Rack can collect fine dust and affect movement |
| Typical cost | Often the cheaper option | Usually costs more for comparable capacity |
| Best use in a woodshop | Occasional checks and simple, durable measuring | Repeated measurements where quick readings save time |
How they fit woodworking layout
Suppose you need a 3/8-inch dowel to fit a hole or want to compare a board’s thickness at several points. Either caliper can check the dowel diameter or stock thickness. Close the outside jaws gently around the work, keeping them square to the surface, and use the same light pressure each time. Squeezing hard can compress soft wood and produce a misleading reading.
For a mortise, drawer opening, or small hardware recess, the inside jaws can help check width. They are short and easy to tilt, however; a slight angle can make a narrow opening read wider than it is. Take the measurement at more than one depth if the sides may not be parallel. For a finished fit, test the actual mating part rather than relying on a single caliper reading.
To transfer a small dimension, set the caliper to the measured width and use the jaws as a reference. Do not drag metal jaws across a finished face unless scratches are acceptable. For a line that must be straight and visible over a longer distance, use a rule and a square or marking gauge instead. A caliper’s short jaw faces are not a substitute for a proper layout edge.
Accuracy, resolution, and common errors
Look at the stated resolution before buying. An inch caliper may read to 0.001 inch, but that figure is not a promise that every measurement on wood is accurate to a thousandth. Wood moves with moisture, pressure, and grain direction; a small chip or dust particle between the jaw and work can also skew the result. For most furniture and cabinet layout, repeatability and a good fit matter more than chasing the smallest displayed increment.
Check a caliper by closing the jaws and confirming that it reads zero. If it does not, clean the jaw faces and try again. A dial caliper may have a bezel that can be rotated to set zero, but a reset does not fix worn or damaged jaws. With a vernier tool, read the scale carefully rather than guessing between marks. On either type, measure a known reference, such as a reliable rule or gauge block, if the result looks implausible.
A common failure is measuring across a splinter, glue squeeze-out, or rough-sawn high spot, then cutting every part to match that bad reading. Clean the contact area and take readings at several points. If thickness varies by 1/32 inch along a board, the caliper has found a stock-preparation problem; it has not told you which surface is flat.
Which one should you buy?
Choose a vernier caliper if you measure occasionally, want a straightforward tool, or work in a dusty shop without a dedicated storage spot. A basic 6-inch vernier caliper is enough for many small woodworking parts. Keep it clean, store it closed or in its case, and avoid using it as a clamp or scribing tool.
Choose a dial caliper if you take many readings while sorting stock, checking repeated parts, or setting up a batch of small components. A 6-inch dial caliper saves time when readings are frequent, provided you protect the rack from chips and dust. If you already own a vernier and only measure a few parts per project, the speed gain is unlikely to justify replacing it.
For either style, prioritize smooth jaw movement, clearly marked scales, and a case you will actually use. Stainless-steel construction is common, but it does not make a caliper immune to rust or impact. Keep the tool away from glue, abrasive sanding dust, and falling stock; wipe it after use rather than oiling the measuring faces.
A practical shop choice
For layout and occasional fitting checks, a vernier caliper is the sensible default: affordable, simple, and adequate for wood’s real-world variability. A dial caliper is the better convenience tool when you repeatedly compare small dimensions and value quick readings. Buy the style that matches how often you measure, then use a square, rule, or marking gauge for the layout work those tools do better.