What's inside
As an Amazon Associate I earn from qualifying purchases. This post may contain affiliate links at no extra cost to you.
How to Choose a Brad-Point Bit’s Spur Geometry for Veneered Panels
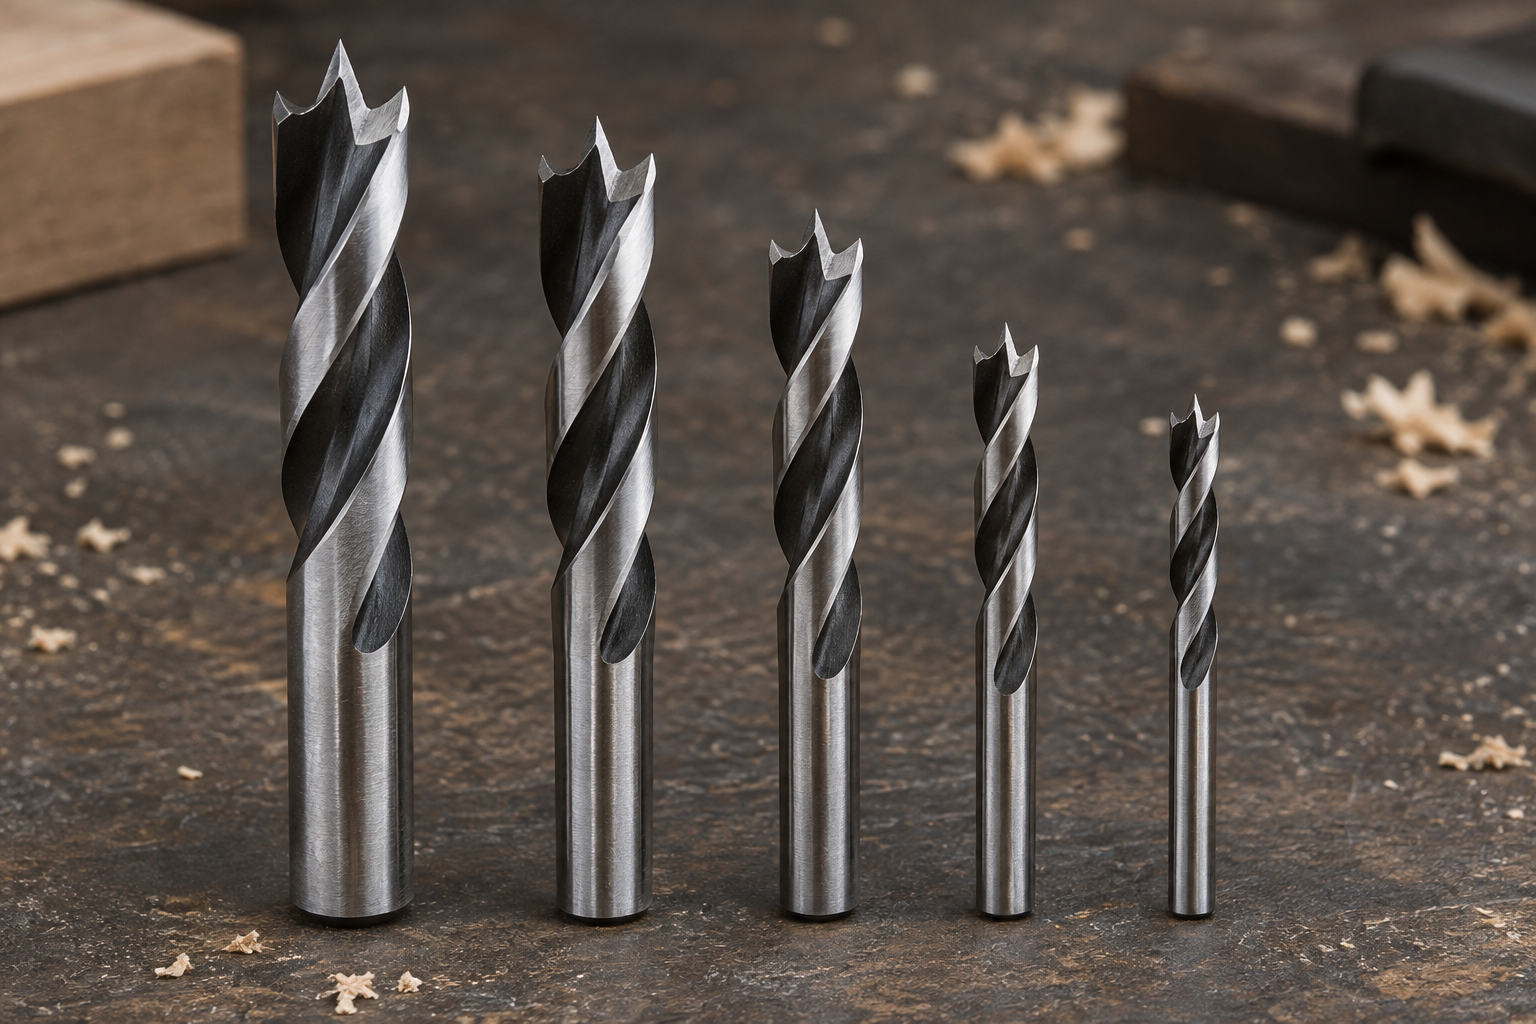
Veneered plywood and veneered MDF punish the wrong drill bit. A standard twist bit can skate across the surface, tear the veneer at the exit, or leave a ragged hole where the bit breaks through. A brad-point bit is usually the better choice because its center point locates the hole and its outer spurs score the surface fibers before the cutting edges remove material.
However, “brad-point” does not describe one universal spur design. The shape, height, sharpness, and cutting angle of the spurs affect how cleanly a bit enters a panel, how it behaves through glue lines, and how long it stays sharp. For most veneered panels, the safest purchase is a brad-point set with pronounced, sharp outer spurs and a center point that is only slightly longer than the spurs.
What the Spurs Actually Do
A brad-point bit has three important cutting features. The center brad keeps the bit from wandering. The two outer spurs score a circular perimeter. The inner cutting lips then clear the waste between the center and the scored edge.
That sequence matters in veneer. Veneer is a thin decorative layer—often about 0.5 to 1 millimeter thick—bonded to a less attractive core. If the inner cutting lips reach the surface before the perimeter is scored, they can lift or rip fibers. A cleanly sharpened spur acts much like a marking knife, separating the veneer along the hole’s edge.
Spurs do not eliminate breakout on the underside. When the bit exits, the remaining core and veneer can still splinter. They mainly control entry and the visible surface. For a through-hole, support the panel with scrap wood, drill from the finished side, and reduce pressure as the center point approaches the back.
Spur Geometry Compared
| Spur design | Best use | Advantages | Limitations |
|---|---|---|---|
| Tall, sharply projecting spurs | Thin hardwood veneer and clean entry holes | Scores veneer early; excellent edge definition | Can catch and chip fragile veneer if forced |
| Moderate-height spurs | General veneered plywood and MDF | Good balance of clean cutting and durability | Less aggressive on very brittle surfaces |
| Short or rounded spurs | Rough construction panels and occasional drilling | More tolerant of abuse and minor impacts | More likely to fuzz or chip decorative veneer |
| Replaceable or separately ground spurs | Frequent cabinet or furniture work | Can be sharpened precisely; consistent results | Usually costs more and requires careful maintenance |
For visible veneer, avoid bits whose spurs look blunt, rounded, or barely higher than the cutting lips. A bit does not need exaggerated knife-like points, but the spurs should form a continuous, crisp outer corner. Inspect them under a bright light. A polished-looking rounded edge is often a dull edge, even if the bit is new.
Choose Spur Height for the Panel
Spur height is a trade-off. Taller spurs engage the veneer before the main cutting edges and generally produce a cleaner circle. They also have more leverage against the wood. In thin veneer over plywood, a tall, sharp spur can snag a loose flake or follow a void in the core, leaving a chipped edge.
Moderate-height spurs are the best default for panels between roughly 6 and 19 millimeters thick. They score the face veneer without making the bit overly aggressive. Tall spurs make more sense when the hole is highly visible and the veneer is firmly bonded, such as a good-quality oak- or birch-faced cabinet panel.
Short spurs are acceptable when the panel will be painted, hidden, or covered by a hinge plate. They are also reasonable for inexpensive melamine-faced particleboard if the surface is supported and the hole will be concealed. They are not the first choice for a visible hole in walnut, maple, cherry, or other thin hardwood veneer.
Shape, Cutting Angle, and Bit Quality
A narrow, pointed spur cuts a more defined line than a broad, blunt spur. Look for symmetrical spurs on both sides of the bit. If one spur is taller, the bit can cut an oval-looking entrance or pull sideways as it starts.
The cutting lips should meet the center point cleanly and sit at the same height. Poorly ground lips make one side remove more material, which increases heat and can push the bit off line. This is especially noticeable with larger sizes, such as 10 to 16 millimeters, where the cutting load is higher.
High-speed steel is adequate for occasional work, and a budget brad-point HSS bit set can be perfectly sensible for a few cabinet projects. For repeated drilling in plywood, hardwood veneer, or abrasive engineered panels, carbide-tipped brad-point bits hold their edge longer. They cost more and are less forgiving if dropped or run into a screw.
Technique Still Matters
Even the best spur geometry cannot compensate for excessive speed and feed pressure. For bits from 3 to 6 millimeters, a handheld drill can often run around 1,500 to 3,000 rpm in softwood-faced panels. In hardwood veneer, use the lower part of that range and let the bit cut rather than forcing it. Larger bits should run slower; a 12-millimeter bit often performs better around 800 to 1,500 rpm, depending on the material and drill.
Clamp the panel securely. A backing board prevents the exit veneer from exploding, while masking tape can reduce minor surface splintering. Tape is not a substitute for backing support. For a blind hole, set a depth stop or wrap tape around the bit, but remember that the center brad extends beyond the cutting lips and may penetrate slightly deeper than expected.
Start the bit square to the surface. If you tilt it during entry, one spur cuts first and can create a crescent-shaped chip. Once the hole is established, use light, steady pressure. Clear chips by briefly withdrawing the bit rather than repeatedly plunging harder.
Which Bit Should You Buy?
Choose moderate-height, sharply ground spurs for most veneered plywood and MDF. Choose tall, crisp spurs when surface appearance is critical and you can control the drill accurately. Choose cheaper short-spur bits only when the hole is hidden, the panel is disposable, or the veneer will be painted.
If you drill many hinge, shelf-pin, or cable-management holes, compare a quality professional brad-point wood bit set with a budget set before buying. Look for consistent spur height, clean grinding, and sizes that match your hardware. For repeated large holes, a carbide-tipped brad-point set can justify its price, but it will not rescue a panel drilled without backing support or with a dull, overheated bit.