What's inside
As an Amazon Associate I earn from qualifying purchases. This post may contain affiliate links at no extra cost to you.
Our Top Picks
 KAKURI Wood Marking Gauge Double Blade 3.5"1 Count (Pack of 1)4.8 x 3.9 x 2.8 inches0.3 PoundsCheck on Amazon
 KAKURI Wood Marking Gauge for Woodworking 3.5"1 Count (Pack of 1)2.3 x 4.3 x 5.9 inches0.2 poundsCheck on Amazon
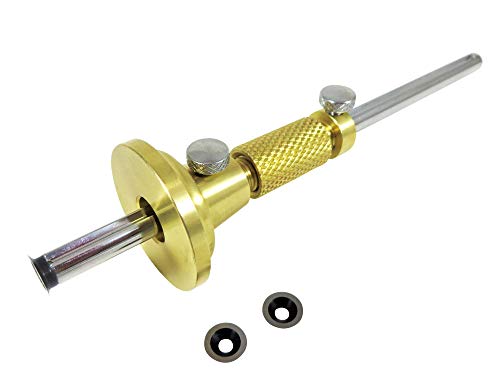
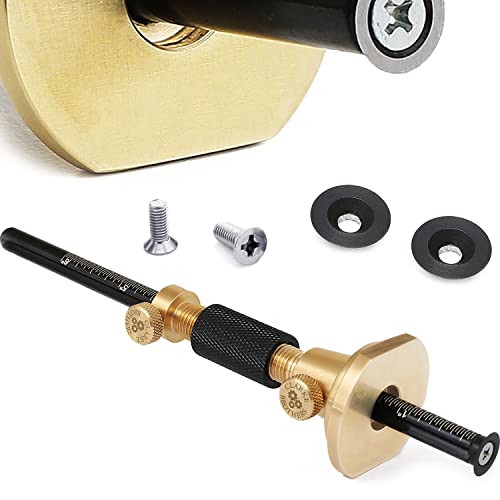
Best Cutting Gauge for Scoring Veneer and Hardwood
A cutting gauge is one of the simplest ways to make a clean, repeatable line across veneer, plywood, and hardwood. It uses a fence to register against an edge and a blade to score the fibers at a fixed distance. That is different from a marking gauge, which normally uses a pointed pin and is better suited to laying out joinery across solid wood.
For most veneer work, the best choice is a wheel-style cutting gauge with a sharp, adjustable blade. The wheel cuts instead of dragging a point through the surface, so it produces less breakout when the grain changes direction. A traditional knife-style gauge is better when you need a narrow, aggressive score in hardwood or want to follow a line very precisely.
As an Amazon Associate we earn from qualifying purchases at no extra cost to you.



Quick comparison
| Gauge type | Best use | Main advantage | Main drawback |
|---|---|---|---|
| Wheel cutting gauge | Veneer, plywood, cross-grain layout | Clean scoring with low tear-out | Can compress soft veneer if dull |
| Knife-style cutting gauge | Hardwood joinery and deep layout lines | Very crisp, narrow cut | More likely to catch or follow grain |
| Marking gauge with pin | Fast rough layout in solid wood | Low cost and simple adjustment | Prone to tear-out in veneer |
| Panel or veneer scoring gauge | Repeated cuts on sheet goods | Long fence and stable registration | Less versatile for small joinery |
What to buy
For a general-purpose shop, start with a wheel cutting gauge that has a rigid fence, a metal locking screw, and a blade that can be sharpened or replaced. A wheel between roughly 15 and 25 mm in diameter is a useful range. Smaller wheels fit tight areas, while larger wheels roll more smoothly along an edge.
Look for at least 75 mm of usable fence adjustment if you work on cabinet parts or wide rails. For veneer edging and small joinery, 40 to 60 mm is usually enough. The fence should lock without twisting. Cheap gauges often appear tight at first, then shift by 1 mm or more when pushed across a hard board. That is enough to spoil a face frame or leave an uneven veneer border.
A knife-style gauge is the better specialist tool for hardwood joinery. Its blade can make a deeper line than a wheel, which helps define shoulders for a tenon or the edge of a housing. A good knife-style cutting gauge should have a blade that is secured from the side or with a proper clamp, not merely held by a small grub screw that is easy to strip.
The cheaper option is fine if you only score occasional veneer or mark parts that will be covered by a saw kerf. A basic gauge costing less than a premium hand tool can work accurately when its fence is square and the blade is sharp. Check it against a steel rule before trusting it on expensive material.
Wheel versus knife blades
A wheel blade is forgiving. It rolls over small changes in grain and tends to leave a continuous line without digging deeply into the fibers. This makes it the safer choice for 0.6 to 1.5 mm wood veneer, thin plywood faces, and cross-grain cuts. It also works well for marking the edge of a laminate or separating a finished area from one that will be trimmed.
The limitation is that a wheel can bruise soft wood instead of cutting it if the edge is dull. It can also leave a wider, less sharply defined line than a knife. On a visible hardwood layout, that extra width may make it harder to position a chisel accurately.
A knife blade makes a cleaner, narrower incision and gives a chisel a clear wall to register against. It is preferable on maple, beech, and other dense hardwoods, particularly for dovetails and shoulder lines. It is less forgiving on figured grain. If pushed against the grain, the blade can dive into a curl, wander several millimeters, or lift a chip from the surface.
Some gauges accept both blade styles. That is the most practical arrangement if you build furniture and also do veneer work. A dual-blade cutting gauge costs more, but switching between a wheel and knife is cheaper than buying two complete tools.
How to score veneer without breakout
Set the fence from the reference edge, then test the gauge on scrap from the same sheet. Measure the distance at both ends of the fence. If the blade is 300 mm from the edge at one end and 301 mm at the other, correct the fence before marking the workpiece.
Make the first pass lightly, using only enough pressure to establish the line. On veneer, two or three light passes are safer than one forceful pass. Keep the fence firmly against the edge and pull the gauge toward you rather than pushing it away. Pulling gives better control and reduces the chance of the blade climbing over a knot or damaged edge.
For a cut across the grain, score from both edges toward the center if the surface is fragile. The two cuts meet in the middle, preventing the blade from breaking out as it exits. If the veneer will be trimmed with a router or flush-trim bit, a shallow score about 0.5 to 1 mm deep is usually sufficient.
Using a gauge on hardwood
On solid hardwood, set the blade depth conservatively. A line about 0.5 mm deep is enough for most chisel work; deeper scoring increases the risk of splitting and makes the gauge harder to pull. For a tenon shoulder, score the layout line, then make a second pass with the fence slightly offset if you need a wider visual mark.
Always register the fence against a prepared edge. A rough or tapered edge transfers its error directly to the layout. When marking opposite faces, keep the same reference face against the fence. Reversing the board can introduce a small but visible mismatch, especially when the fence is not perfectly square to the blade.
Maintenance and buying verdict
Keep the blade clean and sharpen knife blades at roughly 25 to 30 degrees. Replace a wheel when it no longer cuts cleanly after honing or when its rim develops a flat spot. Waxing the fence lightly can make it slide more smoothly, but avoid excess wax near veneer glue joints.
Choose a wheel gauge for veneer, sheet goods, and general layout. Choose a knife gauge for hardwood joinery. If your work spans both, buy a convertible tool or add a second inexpensive gauge rather than forcing one blade type to do every job. Accuracy depends more on a rigid fence, a sharp blade, and light controlled passes than on a high price.