What's inside
As an Amazon Associate I earn from qualifying purchases. This post may contain affiliate links at no extra cost to you.
Our Top Picks
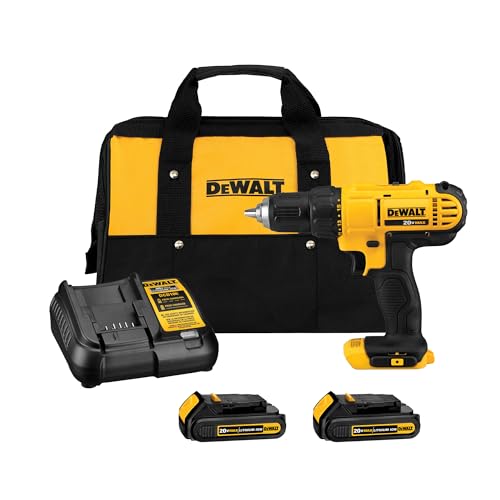
 DEWALT 20V MAX Cordless Drill and Impact DriverOne Size15.06 x 6.4 x 9.88 inches3.6 poundsCheck on Amazon
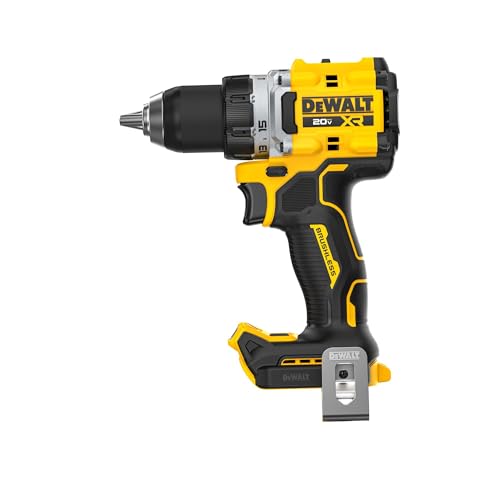 DEWALT 20V MAX XR Brushless Cordless 1/2 in.9 x 3.5 x 7.1 inches9 x 3.5 x 7.1 inches0.86 poundsCheck on Amazon


The short answer
For assembling cabinets in a small workshop, a 12V drill is usually the better fit if you are driving ordinary cabinet screws, drilling pilot holes, and working with plywood or softwood. It is lighter, easier to control inside a cabinet, and less tiring during repetitive assembly. An 18V drill makes more sense if you regularly drive long screws, bore larger holes, or use the same drill for demanding shop tasks such as mixing, drilling thick stock, or fastening into dense hardwood.
Neither voltage guarantees a good result. A sharp bit, a correctly sized pilot hole, and a clutch setting that prevents overdriving matter more than extra power for most cabinet work.
As an Amazon Associate we earn from qualifying purchases at no extra cost to you.



What cabinet assembly demands
Most cabinet assembly involves drilling pilot holes and driving screws roughly 1 to 2½ inches long. The work calls for low-speed control and a tool that fits between sides, shelves, and face frames—not maximum torque. A drill that is awkward to hold square can strip a screw head or push a fastener through a panel before its extra power helps.
Cabinet materials vary. A ¾-inch plywood panel is forgiving, while a narrow hardwood face-frame rail can split if you skip the pilot hole. Particleboard and MDF hold screws less reliably near edges, so avoid overtightening and use the fastener type specified by the cabinet maker. For assembly screws, start slowly and finish by hand if you need a particularly precise stop.
12V vs. 18V at the bench
| Factor | 12V drill | 18V drill |
|---|---|---|
| Weight and access | Usually lighter and more compact; easier to position in a cabinet | Often bulkier, though compact models can be close |
| Typical cabinet screws | Well suited to pilot holes and common assembly screws | Also well suited; spare power is rarely needed for ordinary fasteners |
| Long or large fasteners | May slow, stall, or drain the battery sooner | More reserve for long screws and repeated heavy fastening |
| Large drilling tasks | Fine for modest holes with suitable bits | Better choice for frequent large holes or thick stock |
| Kit cost and battery ecosystem | Often cheaper for a basic drill kit | Can cost more, but may share batteries with other shop tools |
These are tendencies, not strict rules. A compact 18V drill may be lighter than a heavy 12V model, and motor design, gearing, battery size, and grip shape all affect performance. Compare the tool’s weight with its battery installed; a bare-tool weight does not tell you how it feels during a full cabinet build.
When 12V is enough
Choose 12V if cabinet assembly is the main job and your fasteners are mostly normal-size screws. It is particularly useful when working inside assembled carcasses, reaching around shelves, or holding a drill at shoulder height. Less weight helps keep the bit aligned, and compact tools are less likely to bump a finished panel.
A 12V drill can still fail when asked to do too much. Driving a long screw into dense hardwood without a pilot hole may stall it, twist the bit, or leave a damaged screw head. If the drill repeatedly slows, stop rather than leaning harder. Check that the bit fits the screw head, make a pilot hole, and use low gear. For occasional stubborn fasteners, a hand screwdriver is often safer than forcing the motor.
If you do not already own compatible batteries, a 12V cordless drill kit is a sensible starting point. Check that the kit includes a battery and charger, and compare the complete kit price rather than the discounted bare-tool price.
When 18V is worth it
Step up to 18V if the drill will also bore larger holes, drive long structural screws, or work regularly in hardwood. Extra power gives more reserve under load and can reduce slowdowns during repeated demanding tasks. It does not remove the need for pilot holes or careful clutch adjustment: too much torque can split a rail, strip a hole, or pull a screw below the surface.
Battery size affects the trade-off. A large battery may extend runtime but make the drill heavier, which can be inconvenient for cabinet interiors. For a small workshop, consider whether you already own batteries in an 18V platform; sharing them with a saw or sander can make the upgrade more worthwhile. If cabinet work is the only use, the added bulk and cost may buy little.
For a mixed workshop, compare a compact 18V drill kit with a 12V kit by battery-included weight, clutch control, chuck size, and warranty—not voltage alone.
Set up to avoid damage
Use a drill bit matched to the screw’s shank and the material. For hardwood, make a pilot hole large enough to ease the shank without removing all the threads’ grip. Test on an offcut when unsure. Clamp narrow pieces, keep the drill square, and drill close to the center of a rail rather than near its edge.
Set the clutch low and raise it only until the screw seats. If a screw keeps sinking too far, the clutch is too high, the material is soft, or you are driving too quickly. If it stops proud, check the bit and pilot hole before increasing torque. A drill’s clutch is a useful limit, not a guarantee—settings differ between tools and materials.
Keep a fresh driver bit on hand. A worn or mismatched bit cams out, chewing up screw heads and finished surfaces. For a row of identical fasteners, use a depth stop or practice on scrap, then check the first few screws before continuing.
Make the buying decision
Buy 12V if you mainly assemble cabinets, value control in tight spaces, and already have—or can get—a complete kit at a fair price. Buy 18V if cabinet work is only one part of a broader workload that includes frequent heavy drilling or long fasteners. If you already own an 18V battery platform, using a compact drill from that system may be the cheapest practical choice.
Either way, prioritize a comfortable grip, a two-speed gearbox, a dependable clutch, and a chuck that holds bits securely. For cabinet assembly, those details reduce mistakes more reliably than buying the highest-torque drill on the shelf.