What's inside
As an Amazon Associate I earn from qualifying purchases. This post may contain affiliate links at no extra cost to you.
When a finish nailer will not reach the fastening point, the problem is usually the magazine, not the nail. Straight and angled nailers use different magazine layouts, and that changes how close you can work to a wall, cabinet side, or inside corner.
For most tight inside corners, an angled finish nailer is the easier tool to use. It gives the nose a better approach angle and often has a slimmer front end. A straight finish nailer is still the better value for broad trim work, especially when the fastening surface is open and easy to reach.
As an Amazon Associate we earn from qualifying purchases at no extra cost to you.


Our Top Picks


The Basic Difference
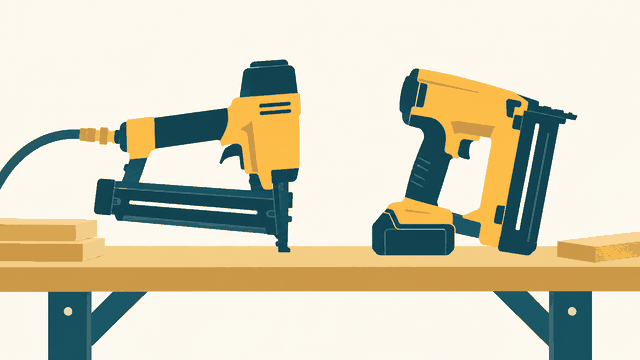
A straight finish nailer feeds nails parallel to the tool body. The magazine extends directly behind the nose, so the complete tool is relatively simple and often less expensive. Common straight finish nailers drive 16-gauge nails, although 18-gauge straight brad nailers are also common.
An angled finish nailer holds its nail magazine at an angle to the nose. The tool can approach a corner while the magazine swings away from the adjoining surface. Most angled finish nailers are 15-gauge tools, though angled 16-gauge models are also available.
That distinction affects more than corner access. Nail diameter, head size, tool balance, magazine capacity, and the cost of nails all change with the format. Check the nail gauge before comparing prices; a 15-gauge angled tool is not a direct substitute for every 16-gauge straight nailer.
Which One Reaches Tight Corners Better?
An angled nailer usually wins at inside corners. Suppose you are installing door casing that meets a return wall. With a straight tool, the magazine may hit the adjacent wall before the nose is flat against the casing. You may have to hold the tool diagonally, which makes it harder to keep the nose square and increases the chance of a visible angled nail hole.
With an angled nailer, the nose can sit near the corner while the magazine points away from the return. This is particularly useful when the trim is only 1 1/2 to 2 1/2 inches wide, or when cabinet face frames leave little room for the tool body.
There is a limit. An angled nailer does not automatically fit every corner. The nose still needs a flat contact area, and a bulky battery pack or rear-mounted air hose can become the new obstruction. Some angled tools also have a wider magazine head than expected. Test-fit the tool before committing to a long run of trim.
Straight vs. Angled Finish Nailers
| Feature | Straight finish nailer | Angled finish nailer |
|---|---|---|
| Typical gauge | 16-gauge; 18-gauge versions are common in brad nailers | 15-gauge or 16-gauge |
| Inside-corner access | Acceptable in open layouts; magazine can interfere | Usually better; magazine clears adjoining surfaces |
| Holding power | Good with 16-gauge nails | Excellent with larger 15-gauge nails |
| Hole size | Smaller than 15-gauge, especially with 18-gauge tools | Larger, requiring more careful filling |
| Typical cost | Often lower for both tool and nails | Often higher, especially cordless models |
| Best fit | General trim, baseboard, and open face frames | Door casing, crown transitions, cabinets, and tight returns |
Nail Strength and Finish Quality
The angled format is often paired with 15-gauge nails. These have a larger shank and a noticeable head, giving them more grip in dense hardwood, wide casing, and heavier baseboard. A 15-gauge nailer is useful when trim must resist seasonal movement or when you are fastening through thicker material.
The trade-off is a larger hole. On painted trim, that may mean a little more filler and sanding. On stained or clear-finished wood, the hole can be harder to disguise. A straight 16-gauge nailer leaves a smaller mark while still providing enough holding power for most interior baseboard and casing. An 18-gauge brad nailer leaves an even smaller hole, but it is better for narrow, delicate trim and temporary positioning than for heavy casing.
Nail length matters as much as gauge. A useful rule is to drive the nail roughly 2 to 3 times as deep into the framing or solid substrate as the thickness of the trim, while avoiding electrical cables, plumbing, and fragile edges. For example, 2-inch nails suit much ordinary casing, but very thick built-up trim may need 2 1/2 inches. Always follow the tool’s specified nail range.
Common Problems in Corners
Magazine collision: The tool nose reaches the corner, but the magazine contacts the wall. This is the main straight-nailer problem. Do not twist the tool hard against the trim; the nail can exit through the edge or drive at an unwanted angle.
Insufficient contact: If the nose is not fully pressed against the work, the safety mechanism may not fire. Pressing harder can dent soft pine or leave a circular mark. Keep the nose flat and move the tool rather than forcing it into position.
Blowout: A nail driven too close to an end or edge can split the trim. Stay at least 1/2 inch from an end when practical, and use shorter nails or a smaller-gauge tool on narrow returns. Dense hardwood may need a slightly lower depth setting and a test piece.
Overdriving: A deep crater takes more filler and can weaken thin trim. Start with the depth adjustment near flush, then test on scrap. Pneumatic tools also need appropriate pressure; many finish nailers operate around 70 to 120 PSI, but the manufacturer’s range takes priority.
Which Tool Should You Buy?
Choose an angled finish nailer if tight inside corners are a regular part of the work, or if you install door and window casing, crown molding returns, built-up trim, or cabinets. A 15-gauge angled finish nailer offers the strongest general-purpose combination for substantial trim. If you want smaller holes and work with lighter material, an angled 16-gauge finish nailer is a sensible compromise.
Choose a straight finish nailer when most of your fastening is on open, flat surfaces and keeping costs down matters. For baseboard, shoe molding, simple casing, and occasional repairs, a 16-gauge straight finish nailer is often all you need. The cheaper option is especially reasonable if you can approach each fastening point squarely and do not regularly work inside tight returns.
For delicate trim, consider an 18-gauge brad nailer instead of either finish-nailer format. It will not match a 15-gauge tool for structural holding power, but it reduces filling and splitting on small molding.
What to Check Before Buying
Look at the nose width, not just the magazine angle. Confirm the tool accepts the nail lengths you use, check whether the magazine clears a sample corner, and compare the weight with a battery or hose attached. A tool that is technically capable but awkward after 30 minutes will produce poorer results.
Also check depth adjustment, a no-mar tip, dry-fire lockout, jam access, and trigger options. Sequential firing is safer and more controlled for finish work; bump firing is faster but easier to misplace. If you already own a compressor or battery platform, staying within that system may save more money than choosing the cheapest nailer.