What's inside
As an Amazon Associate I earn from qualifying purchases. This post may contain affiliate links at no extra cost to you.
Our Top Picks
 DEWALT ATOMIC Compact Series™ 20V MAX* Brushless CordlessOne Size12.35 x 4.84 x 9.7 inches0 poundsCheck on Amazon


Best 23-Gauge Pin Nailer for Attaching Delicate Applied Molding
For delicate applied molding, the best 23-gauge pin nailer is usually a small pneumatic model with adjustable depth, a narrow nose, and a trigger that does not require excessive force. My pick for most trim work is the Metabo HPT NP35A 23-gauge pin nailer. It is light, accepts common 5/8- to 1-3/8-inch headless pins, and is easier to control than many cordless alternatives.
A 23-gauge pinner is not a structural fastener. It is a positioning tool. Glue provides the long-term bond; the pins hold small molding in place while the adhesive cures. That distinction matters because a pin that is too short, too deep, or placed too close to an edge can split the molding without adding useful holding power.
As an Amazon Associate we earn from qualifying purchases at no extra cost to you.


Quick comparison
| Type | Best use | Main advantage | Main drawback |
|---|---|---|---|
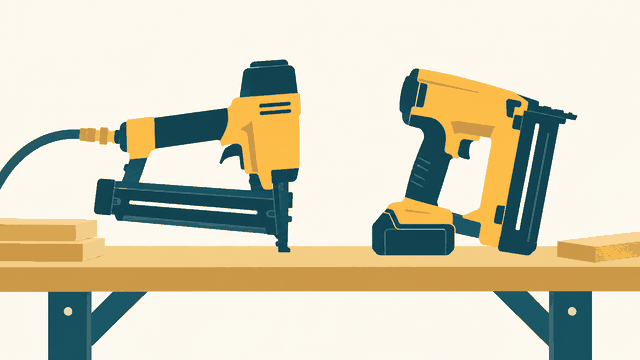
| Pneumatic 23-gauge pinner | Frequent trim and cabinet work | Light, consistent, inexpensive to run | Needs compressor and hose |
| Cordless 23-gauge pinner | Small jobs and punch-list work | No hose or compressor | Heavier and usually more expensive |
| Budget pneumatic pinner | Occasional home projects | Low purchase price | More variation in depth and trigger feel |
Why the Metabo HPT is the best pick
The NP35A has the characteristics that matter most when installing thin applied molding: a compact body, a narrow contact nose, and a magazine that covers the pin lengths commonly used for small trim. Its 23-gauge pins leave holes that are usually invisible after a small amount of filler or paint, and the tool is narrow enough to reach close to corners and profiles.
For delicate work, balance matters more than raw driving power. A heavy tool tends to roll as you press the nose against a narrow molding strip. That can push the pin into the edge instead of into the broad face of the trim. The Metabo HPT is not the only good pneumatic pinner, but it is a sensible middle ground between low-cost tools with inconsistent results and premium tools whose extra features are difficult to justify for occasional molding.
Run a pneumatic pinner at the pressure specified by the manufacturer, commonly around 70 to 100 psi, and start at the lower end. On soft pine, poplar, MDF, or painted composite molding, excessive pressure can bury the pin head below the surface or drive it through the thin edge. Increase pressure in small steps only if the pin is not seating fully.
When a cordless pinner makes more sense
A cordless tool is convenient when you are installing a few feet of molding in a finished room and do not want to drag in a compressor. It also avoids hose marks on freshly painted walls. The trade-off is weight. Battery, motor, and firing mechanism can make a cordless pinner substantially heavier than a pneumatic model, which makes it harder to hold steady on narrow trim.
Choose a cordless 23-gauge pin nailer if setup time matters more than balance, or if you already own the battery platform. For one room of applied molding, the cheaper option is fine if you have a compressor available. Buying a battery, charger, and tool solely for this job often costs more than a pneumatic setup.
Pin length and placement
Pin length should generally be about two to three times the thickness of the molding, with enough penetration into the substrate to hold the piece without exiting the back. For 1/4-inch applied molding, 5/8- or 3/4-inch pins are often appropriate. For thicker trim, 1-inch or 1-3/16-inch pins may be better. Always test on offcuts because the substrate changes the result: MDF accepts pins differently than hardwood, plywood, or drywall-covered framing.
Keep pins at least 1/4 inch from the edge of narrow molding when possible. On very thin profiles, place the nail through the thicker center section and angle your spacing rather than firing directly toward an outside corner. A pin driven too close to the edge can cause a split that will remain visible after paint.
Space pins roughly 8 to 12 inches apart on straight runs, with one near each end but not right at the tip. Use adhesive continuously or in small dabs, depending on the manufacturer’s instructions. Pins should hold the molding flat while the glue cures; they should not be used to pull a bowed piece into place. If the trim is badly bowed, correct the fit first or use temporary clamps and tape.
Features worth paying for
Depth adjustment is valuable, but it is not a substitute for testing. A tool with a no-mar tip helps protect painted surfaces and soft wood. A low-profile nose is useful around inside corners. A rear exhaust is preferable when working near finished surfaces because it directs oily compressor air away from the work.
Look for a magazine that clearly shows remaining pins and opens without tools. A dry-fire lockout is helpful, though not essential. When a magazine runs empty, continuing to fire can leave a deeper-than-normal mark or damage the workpiece. A comfortable trigger also matters: a stiff trigger encourages the user to press harder, which can shift narrow molding before the pin fires.
Common failure modes
Pin sinks too deeply: Lower air pressure, reduce the depth setting, or use a shorter pin. Filling a series of cratered holes is slower than adjusting the tool.
Pin stands proud: Increase pressure slightly, check for a clogged driver channel, and confirm that the pin length is suitable for the material. Do not strike the tool with a hammer.
Molding splits: Move farther from the edge, use a shorter pin, and test a different firing angle. Hard hardwood profiles may need predrilling despite the small fastener.
Pin bends or misses: Hold the nose square to the work and press it firmly against the molding before pulling the trigger. A loose fit between the nose and a narrow profile can deflect the pin.
Buying recommendation
Buy the Metabo HPT-style pneumatic setup if you expect to install trim more than once or twice. Add a 23-gauge headless pin assortment covering 5/8 to 1-3/8 inches, a small air filter, and a few scrap pieces for testing. If you have no compressor and value portability, choose a cordless 23-gauge pinner compatible with batteries you already own. For occasional use, a budget pneumatic model can work perfectly well, provided you test its depth and keep the pins out of the fragile edges.