What's inside
As an Amazon Associate I earn from qualifying purchases. This post may contain affiliate links at no extra cost to you.
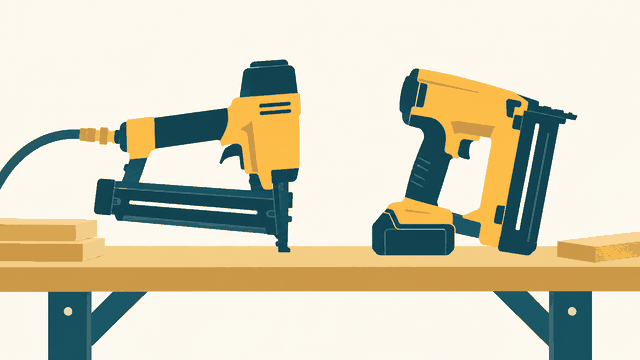
For trim work, a pneumatic finish nailer and a cordless finish nailer can drive the same type of 15- or 16-gauge nails, but they feel very different on the job. The pneumatic tool is usually lighter and starts working quickly once the compressor and hose are ready. The cordless tool needs no hose, but its battery adds weight and its setup time is mostly spent charging and managing batteries.
The better choice depends less on raw driving power than on how you work. A shop-based trim carpenter may prefer the light, balanced feel of a pneumatic nailer. Someone installing one room of baseboard may save time with a cordless tool because there is no compressor to carry, connect, or adjust.
As an Amazon Associate we earn from qualifying purchases at no extra cost to you.


Our Top Picks
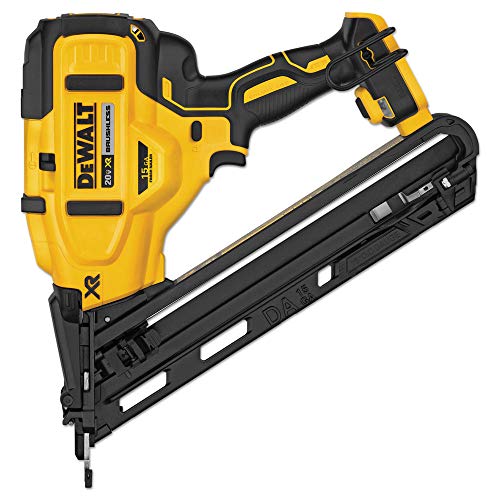 20V MAX XR Lithium-Ion Cordless 15-Gauge Angled Finish1 Count (Pack of 1)14.36 x 14.09 x 4.61 inches6.62 poundsCheck on Amazon


Weight and balance
A typical pneumatic 16-gauge finish nailer weighs about 3.5 to 4.5 pounds without nails. Its air hose adds roughly 1 to 3 pounds depending on length and material, but that weight is mostly hanging behind the tool rather than in your hand. A compact compressor can weigh 25 to 40 pounds, although it stays on the floor.
Cordless finish nailers commonly weigh 6 to 8 pounds with a battery and a full magazine. That difference is immediately noticeable when installing crown molding overhead or holding a tool at arm’s length. The cordless nailer also tends to be bulkier around the motor and battery, making it harder to fit into tight inside corners.
The practical issue is not only total weight. A pneumatic nailer usually has a narrow, pistol-like body with a low center of gravity. Cordless models may feel rear-heavy or top-heavy, depending on the battery position. Some balance well; others put more strain on your wrist during a long run of baseboard.
For occasional work, the extra weight may be an acceptable trade for avoiding a hose. For several hours of repetitive fastening, a 16-gauge pneumatic finish nailer is generally easier to hold and aim.
Setup time and portability
Pneumatic setup has more individual steps. You need a compressor with enough pressure and air delivery, an air hose, fittings, and nailer oil if the tool requires it. You also need to set the regulator, connect the hose, and wait for the tank to pressurize. In a home workshop, this may take two to five minutes. Moving between rooms can take longer because the compressor and hose must follow you.
Many finish nailers operate around 70 to 120 PSI. A small compressor can run one nailer, but a low-capacity unit may cycle frequently during rapid fastening. A compressor that cannot keep up causes pauses and can produce inconsistent nail depth. Moisture in the air line can also contribute to corrosion or unreliable operation, particularly with inexpensive compressors.
A cordless nailer is faster to deploy if its battery is charged. Insert the battery, load the magazine, select the depth setting, and test-fire into scrap wood. That is often a one-minute process. There is no hose to drag across a finished floor and no compressor noise during the work.
Its weakness is readiness. A dead battery turns a quick job into a charging delay. Charging a depleted pack can take 30 minutes to several hours, depending on the battery and charger. Buying a second battery solves the interruption but raises the total cost. Cold batteries and heavily used packs can also deliver fewer shots than expected.
| Factor | Pneumatic finish nailer | Cordless finish nailer |
|---|---|---|
| Tool weight | About 3.5–4.5 lb | About 6–8 lb with battery |
| Extra equipment | Compressor, hose, fittings, oil if specified | Battery and charger |
| Typical deployment | About 2–5 minutes in a workshop | About 1 minute with a charged battery |
| Noise while fastening | Compressor cycles and tool exhausts air | Usually quieter during individual shots |
| Best advantage | Light tool and sustained use | Portability and no hose |
| Main penalty | Compressor and hose management | Hand fatigue and battery dependence |
Driving performance and failure points
Both types are capable of cleanly fastening baseboard, door casing, window trim, and cabinet face frames when matched with the correct nail length. A 16-gauge nailer leaves a larger hole than an 18-gauge brad nailer but gives better holding power. For delicate molding, an 18-gauge tool may be the more suitable category regardless of power source.
Pneumatic models deliver consistent performance when the compressor maintains pressure. Common problems include a hose snagging on corners, loose quick-connect fittings, and nails sitting proud because the regulator or depth setting is wrong. A compressor that cycles too often may overheat or simply slow the job.
Cordless tools have their own failure modes. The battery can make the tool slow to cycle as it loses charge, and some models refuse to fire if the battery is too cold or the safety nose is not fully depressed. A dirty driver channel can cause repeated misfires. The added mass also makes it easier to bump the workpiece, leaving dents in soft pine if you press too hard.
Before blaming either tool, test on scrap from the actual trim. Set the depth so the nail head is just below the surface, not buried deeply enough to split a narrow edge. Keep the nailer square to the face; driving at an angle increases the chance of blowout on the back or side of the molding.
Cost and buying decision
If you already own a suitable compressor and hose, pneumatic is usually the cheaper option. A basic pneumatic nailer may cost considerably less than a cordless tool kit, and replacement batteries are not involved. It is also the sensible choice for a workshop where the tool will be used weekly.
If you own no compressor, the calculation changes. A compressor, hose, fittings, and nailer can approach or exceed the cost of a cordless kit. For a single room, repair list, or mobile punch-list work, a cordless 16-gauge finish nailer kit can be cheaper in total once the required accessories are counted.
Choose pneumatic when low hand fatigue, long working sessions, and predictable operating cost matter most. Choose cordless when setup, portability, and freedom from hoses matter more than tool weight. If the project involves only a few dozen nails and you already have a compatible battery, cordless is convenient. If it involves hundreds of nails overhead, the lighter pneumatic tool is usually worth the compressor hassle.
A faster, safer setup for either type
For pneumatic work, place the compressor near the room entrance, use the shortest hose that reaches the work, and set pressure within the nailer’s stated range. Drain the compressor after use. For cordless work, charge a spare battery before loading the tool, clear the magazine of damaged nails, and keep the battery out of extreme cold.
In both cases, wear eye protection, keep fingers away from the nose, and disconnect the air supply or battery before clearing a jam. The tool that saves two minutes of setup is not the better choice if it forces you to work one-handed, fight a hose, or stop repeatedly to correct depth and misfires.