What's inside
As an Amazon Associate I earn from qualifying purchases. This post may contain affiliate links at no extra cost to you.
Painted trim shows every mistake. A brad nail set too deep leaves a crater in the paint; one set too shallow leaves a shiny metal head that catches the light. The goal is to seat the fastener just below the surface without crushing the wood or breaking through the paint film.
For most interior trim, start with an 18-gauge brad nailer and a modest depth setting, then test on scrap painted the same way as the trim. Nailer depth controls are not calibrated measurements, and paint thickness, wood hardness, nail length, air pressure, and tool condition all affect the result.
Our Top Picks
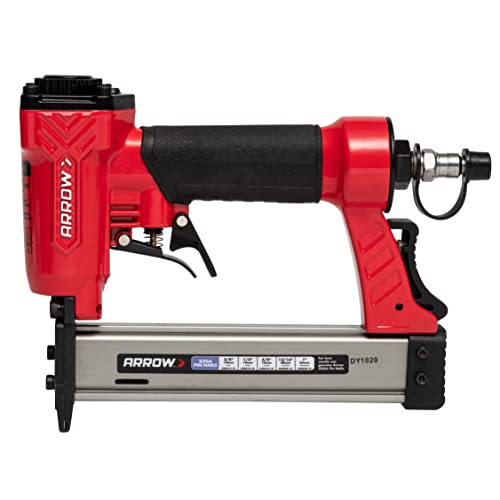 Arrow PT23G 23 Gauge Compact Pneumatic Pin Nailer8.25 x 2 x 10 inches8.25 x 2 x 10 inchesCheck on Amazon

Choose a nailer that suits the trim
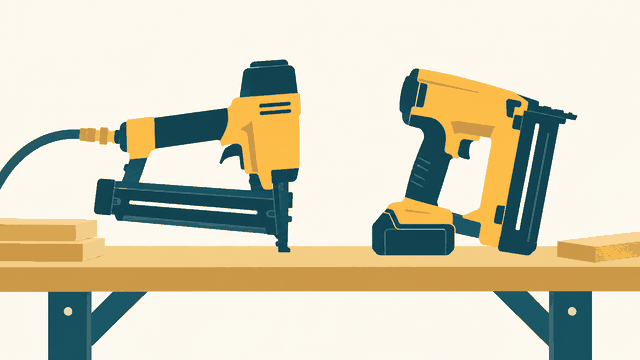
An 18-gauge brad nailer is a practical choice for most casing, baseboard, and small decorative trim. Its relatively narrow fasteners leave smaller holes than finish nails, which means less filling and sanding. For delicate, thin trim, a 23-gauge pin nailer leaves a smaller mark, but pins have less holding power and may not secure heavier pieces on their own.
A 15- or 16-gauge finish nailer offers more holding power for thick, substantial trim, but its larger fastener makes a more visible hole in a painted face. Don’t choose a heavier nailer just to compensate for poor placement or weak adhesive. Match the tool and fastener to the trim’s size and the material behind it.
If you still need a tool, compare an 18-gauge brad nailer with a 23-gauge pin nailer based on how much holding strength the job needs. A pin nailer can be the cleaner option for tiny, light moulding; for ordinary casing or baseboard, an 18-gauge brad nailer is usually more versatile.
Set the depth on scrap first
Use an offcut of the same wood, with the same paint or primer build if possible. Hold the nailer square to the surface, press the nose firmly against the trim, and fire a test nail. Start with the depth control near its middle setting. Adjust it in small increments, testing after each change until the nail head sits just below the paint without tearing or crushing the surface.
There is no universal dial position or air-pressure number that guarantees a flush result. Tool scales vary, and a setting that works on soft pine may drive too deep in a harder hardwood. For a pneumatic nailer, use the lowest pressure that seats the nail reliably, within the manufacturer’s operating range. Make pressure changes in small steps—about 5 to 10 psi at a time—and retest. With a cordless nailer, adjust its depth control rather than trying to compensate by changing how hard you press the tool.
A good test hole is a small, clean dimple with no split paint edge. If the head is proud, increase depth slightly. If the hole has a ragged rim or a deep crater, back the setting off. Nail a few test fasteners at different points: variations in the wood or paint can change the result even along one board.
What a correct nail set looks like
On painted trim, the head should be only slightly below the surface—deep enough to fill neatly, not buried to create a large pocket. A nail head that is flush may show through a thin layer of filler or become visible after sanding. But driving the nail far below the surface creates more filling work and risks damaging the paint and wood fibers.
Leave enough sound material around the nail. Stay away from thin edges and moulding profiles, where a fastener can split the trim or break through a bevel. When fastening narrow pieces, aim toward the thicker part of the profile and use a scrap test to confirm the nail length will not emerge on the other side.
Depth controls and their trade-offs
| Adjustment method | Best for | Trade-off |
|---|---|---|
| Nailer depth dial or wheel | Quick changes between trim thicknesses or wood types | Dial marks are not precise measurements; always test |
| Air-pressure adjustment | Fine-tuning a pneumatic nailer after setting depth | Too little pressure can leave heads proud; changing pressure may affect every shot |
| Separate countersinking tool | Careful work where powered nailing risks damaging a fragile finish | Slower, and it adds a step; sensible for small jobs or touch-ups |
Most jobs are easiest with the nailer’s depth control, followed by a pressure adjustment if the tool is pneumatic. If the trim is very delicate or only a few fasteners need setting, a hand nail set and punch can give you more control. It is slower, but a basic set is inexpensive and can be the safer choice for fragile painted profiles.
Avoid dimples, splits, and proud heads
Keep the nose fully against the trim and the tool square to the surface. A tilted shot can leave the nail head near the surface on one side and too deep on the other. Don’t push so hard that you flex thin trim against the wall. If a piece is loose, hold it firmly in place before firing; movement can cause a nail to skid or leave a mark.
If the nail sinks too far, reduce depth or air pressure and check that the workpiece is supported against the wall. Overdriving can also come from excessive pressure, a damaged driver, or a fastener that is too short for the material. If nails repeatedly go too deep despite careful adjustment, inspect the tool and consult its manual rather than continuing to compensate at the dial.
If heads remain proud, check that the battery is charged or that the compressor and hose maintain the tool’s required pressure. A long, narrow hose or a leaking fitting can cause inconsistent shots. Also confirm that the nailer accepts the fastener type and length you are using. Don’t increase pressure repeatedly to force a poorly matched nail into the trim.
Fill and check the finish
Once the setting is right, keep it consistent and check the first few fasteners on the actual trim before continuing. Use a filler compatible with the paint system, let it dry fully, and sand lightly without cutting through the surrounding paint. Large craters take more filler and sanding, so correcting an overdriving setting early is quicker than trying to hide the damage afterward.
For an inexpensive, reliable setup, an 18-gauge nailer and a scrap test will handle most painted trim. Spend extra on a smaller pin nailer only when the trim is light enough for pins and the smaller holes matter. The cleanest result comes less from buying the most expensive tool than from matching the fastener to the work and tuning the depth before you start.