
What's inside
As an Amazon Associate I earn from qualifying purchases. This post may contain affiliate links at no extra cost to you.
Repeatable router-bit height is less about perfect eyesight and more about using a reference you can trust. A profile that is 1/32 inch too high can leave a sharp ridge, a shallow reveal, or a mismatched joint when parts are assembled. The reliable method is to reference the bit from the router base, bearing, or workpiece—not from the router’s height scale alone.
Our Top Picks
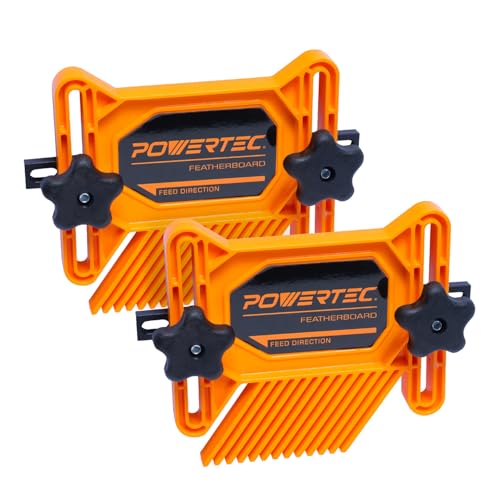 POWERTEC Universal Tandem Featherboards for Table SawFeatherboards (2PCs)10.63 x 7.5 x 2.5 inchesCheck on Amazon


Choose the right reference
Start by deciding which part of the profile must match. For a round-over, the bearing or cutter centerline determines how much material remains above and below the curve. For a rabbeting bit, the bearing controls the rabbet depth while bit height controls its vertical position. For a panel-raising bit, the bottom of the cutter must align with the groove or frame shoulder.
Clean the collet, bit shank, and collet nut before setting height. Dust or pitch can keep the shank from seating consistently. Insert the shank fully, then pull it back about 1/16 inch before tightening. Do not bottom the shank against the inside of the collet. Tighten firmly with the correct wrenches, but do not add a cheater bar.
Use a sharp, undamaged bit. A bent shank, chipped carbide edge, or loose bearing can make a height problem look like a measurement problem. If you regularly change bits, a router bit height gauge or setup block is inexpensive insurance.
Set height on a router table
Unplug the router before touching the bit. Raise the bit roughly into position, then place a straightedge, scrap, or profile sample on the table. Avoid using your fingers to judge a sharp cutter’s position.
For a bearing-guided edge profile, set the bearing flush with the portion of the edge that should remain straight. A round-over bearing should sit at the transition between the flat edge and the desired curve. A chamfer bit’s bearing should be level with the point where the chamfer begins. Make a test cut in scrap from the same thickness and species as the project.
Measure the test piece rather than trusting the router’s graduation marks. If the profile is too high, lower the bit in small increments. If it is too low, raise it. On a typical router, a change of 1/64 inch is visible; 1/32 inch can substantially change a small edge profile.
When the height is correct, lock the router adjustment and make a second test cut without changing anything else. This catches a loose height mechanism. Mark the setting on the scrap with the bit name, material thickness, and date if you expect to repeat the job.
Use a reference block for repeatability
A reference block is usually more dependable than measuring from the router base. Cut a short sample with the correct profile, then use it to set the bit for the next batch. A matching block should be made from the same stock thickness and should show both the profile and the remaining flat surfaces.
For a round-over or chamfer, place the sample against the router-table fence and adjust the bit until the cutter or bearing lines up with the existing profile. For a rabbeting bit, use a sample with the rabbet already cut and align the bearing and shoulder separately. This avoids confusing rabbet depth with vertical placement.
Commercial setup blocks are faster when you use several common bit sizes. A homemade block is fine for one project, especially if it is clearly labeled. MDF works for occasional use, but hardwood or plywood holds up better around bearings and sharp cutters.
Router height-setting methods compared
| Method | Repeatability | Best use | Main drawback |
|---|---|---|---|
| Router scale | Fair | Returning to a previous approximate setting | Scales vary and may not reflect actual cutter height |
| Steel rule or calipers | Good | Bits with a clear flat or bearing reference | Awkward around curved cutters |
| Scrap test cut | Very good | Final setup on real material | Uses extra stock and takes a few minutes |
| Dedicated setup block | Excellent | Repeated production or matching existing profiles | Costs money or requires making and labeling blocks |
Account for the router and lift
A fixed-base router or router lift is usually easier to set repeatedly because the bit height changes through a controlled screw or crank. A plunge router can do the same work, but its depth stop must be locked firmly and checked for play. If you use a plunge router in a table, make sure the conversion and adjustment system is designed for that router; improvised arrangements can shift under load.
A router lift is worth considering when you change heights frequently or work with large panel-raising bits. Search for a router lift for a router table if above-table adjustment is important. For occasional edge work, the lift’s cost may not pay back. A fixed-base router with a careful test-cut routine is often enough.
Do not assume the router’s height lock eliminates movement. Push lightly on the bit with a scrap block after locking it. If the bit moves, inspect the locking mechanism, plunge rods, carriage, or lift screw. Even 1/64 inch of movement can show on a small round-over.
Make the test cut correctly
Use a scrap piece at least 12 inches long so you can feed it safely and see a continuous profile. Match the workpiece’s thickness, grain direction, and face orientation. Edge profiles can look different on end grain, softwood, and plywood veneer.
For a handheld router, clamp the test piece securely and keep the router base flat. Feed against the bit’s rotation: left to right when routing along the near edge with a standard handheld setup. On a router table, feed right to left. A climb cut can pull the router or workpiece forward and ruin the reference edge.
Take light passes when possible. If the desired profile requires removing more than about 1/8 inch of material, use multiple passes rather than forcing the final height in one cut. The bit may deflect, the router may slow, and the resulting profile can vary from one end to the other.
Avoid common height errors
Do not set the height from a bit’s carbide tip if the tip is curved or angled. Use the bearing, a known shoulder, or a completed sample instead. Do not compare a profile cut on one face with a sample cut on the opposite face; tear-out and grain direction can make identical settings look different.
Check the bearing before every repeated run. Spin it by hand with the router unplugged. It should turn smoothly without side-to-side play. A seized bearing can burn the edge and force the workpiece away from the fence, creating an apparent height inconsistency.
For most homeowners and small shops, the cheapest dependable setup is a fixed-base router, a sharp bit, labeled scrap blocks, and a test cut before the real parts. Spend more on a router-table featherboard when stock control is the bigger problem. Height accuracy cannot compensate for a board that lifts, twists, or moves away from the fence during the cut.