
What's inside
As an Amazon Associate I earn from qualifying purchases. This post may contain affiliate links at no extra cost to you.
Choosing between a random orbital sander and a sheet sander for cabinet doors comes down to the finish you need, the shape of the door, and how much sanding you expect to do. A random orbital sander removes material faster and usually leaves a cleaner scratch pattern. A sheet sander is slower, but its rectangular pad makes it easier to sand flat edges, narrow areas, and corners without rounding them over.
For most new cabinet doors, a 5-inch random orbital sander is the better first purchase. For delicate finish sanding, painted doors, and careful work on flat panels, a sheet sander still has useful advantages. Many shops use both, assigning each tool a different part of the job.
As an Amazon Associate we earn from qualifying purchases at no extra cost to you.




Our Top Picks
 SKIL 5” Random Orbital Sander with Cyclonic Dust5 inches7.87 x 4.8 x 5.51 inches3.44 PoundsCheck on Amazon

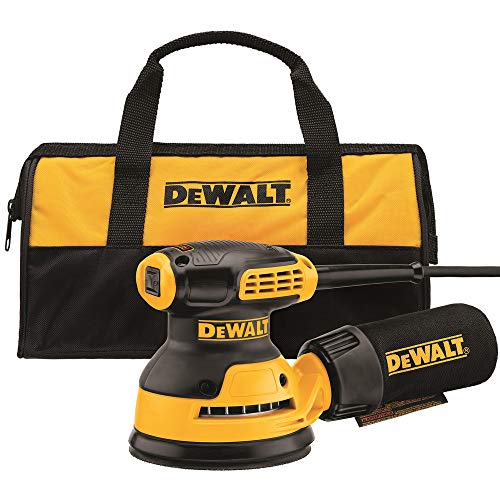


Random orbital vs. sheet sander at a glance
| Factor | Random orbital sander | Sheet sander |
|---|---|---|
| Material removal | Fast | Slow to moderate |
| Scratch pattern | Less directional and easier to hide | Linear; can show swirls or sanding lines |
| Flat panels | Excellent | Good, especially near edges |
| Edges and corners | Can round edges; cannot reach square corners | Better control and corner access |
| Typical paper cost | Higher per disc, usually longer life | Lower, because standard sheets can be cut down |
| Best use | Removing old finish and leveling broad surfaces | Final preparation and detail work |
Where a random orbital sander works best
A random orbital sander combines spinning and eccentric movement. That action removes material quickly while making the scratches less obviously directional than those from a conventional vibrating sander. On a cabinet door, it is particularly effective on large, flat center panels and slab doors.
Use a random orbital with 80- or 100-grit abrasive when removing a thick clear coat, stubborn paint, or small surface defects. Move to 120 grit, then 150 or 180 grit for bare wood that will receive paint or clear finish. Do not assume that jumping straight to 220 grit improves the result. Fine paper can polish the surface rather than remove the scratches from the previous grit, especially on hardwood.
For a dependable general-purpose option, a 5-inch random orbital sander with dust collection is the category to look for. Variable speed and a pad-brake feature are useful, but dust extraction matters more for cabinet work. A vacuum connected to the sander keeps abrasive cuts open and reduces the dust that settles back onto the finish.
The main risk is rounding over edges. Keep the pad flat, use light pressure, and do not let the sander sit on an edge while it is running. A 5-inch pad also cannot reach into a square inside corner. Trying to force it there can damage the adjacent surface.
Where a sheet sander earns its place
A sheet sander, often called a quarter-sheet or finishing sander, uses ordinary abrasive paper held by clamps or a hook-and-loop pad. Its rectangular shape lets you sand closer to a door’s perimeter and into corners. It also feels easier to control when you are lightly sanding between coats of primer or paint.
For finish preparation on already smooth doors, a sheet sander is often enough. Start around 120 or 150 grit to remove raised grain and minor tooling marks, then use 180 grit before primer. Between coats, 220-grit paper with very light pressure is usually sufficient. On a painted door, sanding until the surface is uniformly dull is more important than removing every tiny defect.
A quarter-sheet finishing sander with a vacuum attachment is a sensible low-cost choice when you are working on a few flat doors or mostly doing final sanding. Standard sheets are easy to find and can be cut into quarters, although they may cost less per sheet than dedicated hook-and-loop discs.
Sheet sanders have their own failure modes. Sanding in one direction for too long can leave visible lines that telegraph through paint or stain. The clamps can also loosen, allowing the paper to wrinkle and gouge the work. Keep the sander moving, use moderate pressure, and inspect the surface under strong side lighting.
Door shape and material change the decision
Slab doors are the simplest case. A random orbital sander quickly levels the broad face, while hand sanding handles the perimeter. On raised-panel doors, neither powered sander should be treated as a complete solution. Use the random orbital on the wide flat areas, then sand the profile by hand with folded paper, a sanding sponge, or a shaped abrasive pad.
For routed MDF doors, avoid aggressive sanding on the profiled edges. Excessive pressure can soften crisp details and expose uneven fibers. MDF generally sands predictably, but its edges can become rounded or fuzzy if you stay in one spot. A sheet sander is safer near straight profile boundaries, provided its pad remains flat.
When sanding veneer, the risk is cutting through the thin face layer. Use 150 or 180 grit, minimal pressure, and fewer passes. A random orbital removes material quickly enough to create a bare spot before you notice it. A sheet sander is not automatically safe, but its slower action gives you more warning.
A practical cabinet-door sanding workflow
Remove hinges and hardware, label each door, and support it on a flat padded surface. Vacuum the door before sanding so loose grit does not create deep scratches. If stripping to bare wood, start with the least aggressive grit that removes the existing finish. Use a random orbital for broad areas and stop at 120 or 150 grit once the old coating is gone.
Check the surface with a bright light held at a low angle. Pencil marks are useful: draw a loose grid over the door and sand until the marks disappear evenly. If patches remain, do not automatically switch to a coarser grit; determine whether they are finish, dents, or low spots.
Finish by sanding with the direction of the wood grain, especially if the door will be stained or clear-coated. Vacuum thoroughly and wipe with a clean, dry cloth. Avoid soaking raw MDF or using a wet rag on a surface that will be painted without allowing adequate drying time.
Which sander should you buy?
Choose the random orbital if you are refinishing many doors, removing old coatings, or also need a sander for furniture, tabletops, and general woodworking. It saves substantial time, and its scratch pattern is forgiving when you progress through the grits properly.
Choose the sheet sander if your doors are already fairly smooth, your work is mostly between coats of finish, or you value square corners and low abrasive costs. It is also the cheaper option for occasional projects. The savings are real, but expect slower stock removal and more attention to sanding direction.
If the budget allows only one tool, buy the random orbital and keep a sanding sponge or quality hand-sanding block for corners and profiles. If you already own a random orbital, adding a sheet sander makes sense only when edge control, fine finish work, or inexpensive paper matters more than speed.