What's inside
As an Amazon Associate I earn from qualifying purchases. This post may contain affiliate links at no extra cost to you.
Our Top Picks


Best Bandsaw Blade Welders for Joining and Repairing Blades
The best bandsaw blade welder depends on the blade’s width and thickness, how often you make repairs, and whether you need controlled annealing: occasional small-blade work suits a compact manual machine, while production shops should prioritize repeatable weld pressure, adjustable current and annealing, and support for their widest blades.
A bandsaw blade welder joins the ends of a blade by resistance welding. The joint then needs to be dressed and annealed so it can flex around the wheels without failing. A machine’s maximum blade capacity matters, but so do its minimum capacity, electrode condition, clamping method, and how consistently it heats the joint. There is no one best band saw welder for every shop; use the comparison below to narrow the type that fits your work.
As an Amazon Associate we earn from qualifying purchases at no extra cost to you.


Compare welder types by job and capacity
Capacities and controls differ across models and revisions. The figures below are practical buying ranges for machine categories, not guaranteed specifications for a particular model. Confirm the maker’s current manual before purchasing, especially if your blades are near a capacity limit.
| Welder type | Typical blade width | Typical blade thickness | Annealing and accessories | Best fit |
|---|---|---|---|---|
| Compact manual resistance welder | About 1/8–1/2 in. (3–13 mm) | About 0.014–0.035 in. (0.36–0.89 mm) | Often manual heat timing; check whether a separate annealing control and dressing stone are included | Hobbyists, small woodworking shops and occasional repairs |
| General-purpose shop welder | About 1/8–1 in. (3–25 mm) | About 0.014–0.050 in. (0.36–1.27 mm) | May offer separate weld and anneal settings; commonly includes electrodes and a blade shear or grinder, depending on package | Cabinet shops, schools and repair benches with mixed blade sizes |
| Heavy-duty or industrial resistance welder | About 1/4–2 in. (6–51 mm), model-dependent | About 0.025–0.080 in. (0.64–2.03 mm), model-dependent | Look for repeatable clamping, adjustable weld and anneal cycles, replaceable electrodes, and suitable blade preparation tools | Frequent production work, resawing operations and wider blades |
These ranges are not interchangeable specifications: a machine may handle a wide blade only within a narrower thickness range. Tooth pitch, blade alloy, and the manufacturer’s recommended weld settings also affect suitability. Ask the seller for the exact width-and-thickness chart for the blade material you use.
Which bandsaw welder suits your situation?
- Occasional repairs on narrow blades: Choose a compact manual machine if its minimum and maximum capacity cover your blades. A simple setup can be adequate when you can afford to prepare, weld, dress, and inspect each joint carefully.
- Several blade sizes in a woodworking shop: A general-purpose unit is the more flexible choice. Separate weld and anneal controls help you adjust the process instead of treating every blade as if it were the same thickness.
- Frequent repairs or production use: Prioritize robust clamping, consistent electrode contact, accessible replacement parts, and a repeatable annealing cycle. Saving a few minutes per repair matters less than avoiding a failed joint and the downtime that follows.
- Very wide or thick blades: Buy to the actual blade specification, not a broad “industrial” label. Confirm capacity for both width and thickness, and check whether the machine’s electrical supply and workspace meet installation requirements.
Brands such as Rikon and Laguna Tools offer woodworking equipment, but a brand name alone does not establish that a particular current model is a blade welder or that it fits your blade. Verify the exact product and its published capacity before comparing prices. Compact and general-purpose resistance welders commonly fall in the several-hundred-dollar range; heavy-duty equipment can cost several thousand dollars or more, depending on capacity, controls, and included tooling.
What controls and accessories are worth paying for?
Annealing controls
Annealing softens the hardened weld area after joining, reducing the abrupt change in flexibility that can make a blade crack beside the weld. Some machines let the operator control the anneal cycle separately; others provide a less adjustable process. For mixed blade thicknesses or frequent work, separate control is useful because a setting that heats a thin blade appropriately may not suit a thicker one. Follow the machine and blade makers’ instructions rather than relying on color alone.
Clamping and blade preparation
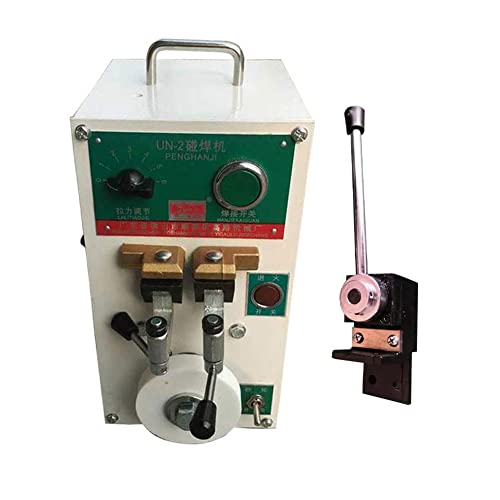
Even alignment and clean, square ends are essential to a sound joint. Check whether the machine holds both ends securely and whether the package includes a shear or preparation tool, grinding or dressing stone, and replacement electrodes. Included accessories vary, so compare the itemized package rather than assuming that a photograph shows everything supplied. A grinder or dressing stone helps remove excess weld material, but it does not correct a poor alignment or an unsuitable weld cycle.
Wear parts and service
Electrodes are consumables: they can pit, collect residue, or lose a clean contact surface, making heating less consistent. Keep them clean and replace or dress them as the manufacturer specifies. Also check availability of electrodes, fuses, switches, and service support before buying. In regular use, dirty contacts and inconsistent blade preparation often cause trouble sooner than a major mechanical failure.
A setup routine that helps prevent repeat failures
- Confirm the blade is weldable on the machine. Check width, thickness, material, and the maker’s limits. Do not assume a blade fits because it can physically sit between the clamps.
- Prepare square, clean ends. Remove damaged sections and cut the ends to meet evenly. Poorly matched ends create a weak or uneven joint that annealing cannot fix.
- Align and clamp the blade. Keep the blade flat and in line, with the teeth oriented as required by the machine instructions. Tight, consistent clamping prevents movement during the weld.
- Set the weld cycle for the blade. Use the manufacturer’s guidance for thickness and material. Avoid compensating for dirty electrodes by simply increasing heat.
- Anneal and dress the joint. Follow the prescribed cycle, let the blade cool as directed, then remove excess material without grinding deeply into the blade body.
- Inspect before installation. Check alignment, the weld bead, and the transition on both faces. Reject a joint with visible cracks, deep notches, or a pronounced step; a questionable repair is not worth running.
For occasional narrow-blade repairs, the best value is usually a compact welder that genuinely covers the blade sizes in your shop and has replacement electrodes available. For varied or frequent work, pay more for reliable clamping and adjustable annealing. For industrial blades, treat the manufacturer’s capacity chart, serviceability, and electrical requirements as must-haves—not optional upgrades.