What's inside
As an Amazon Associate I earn from qualifying purchases. This post may contain affiliate links at no extra cost to you.
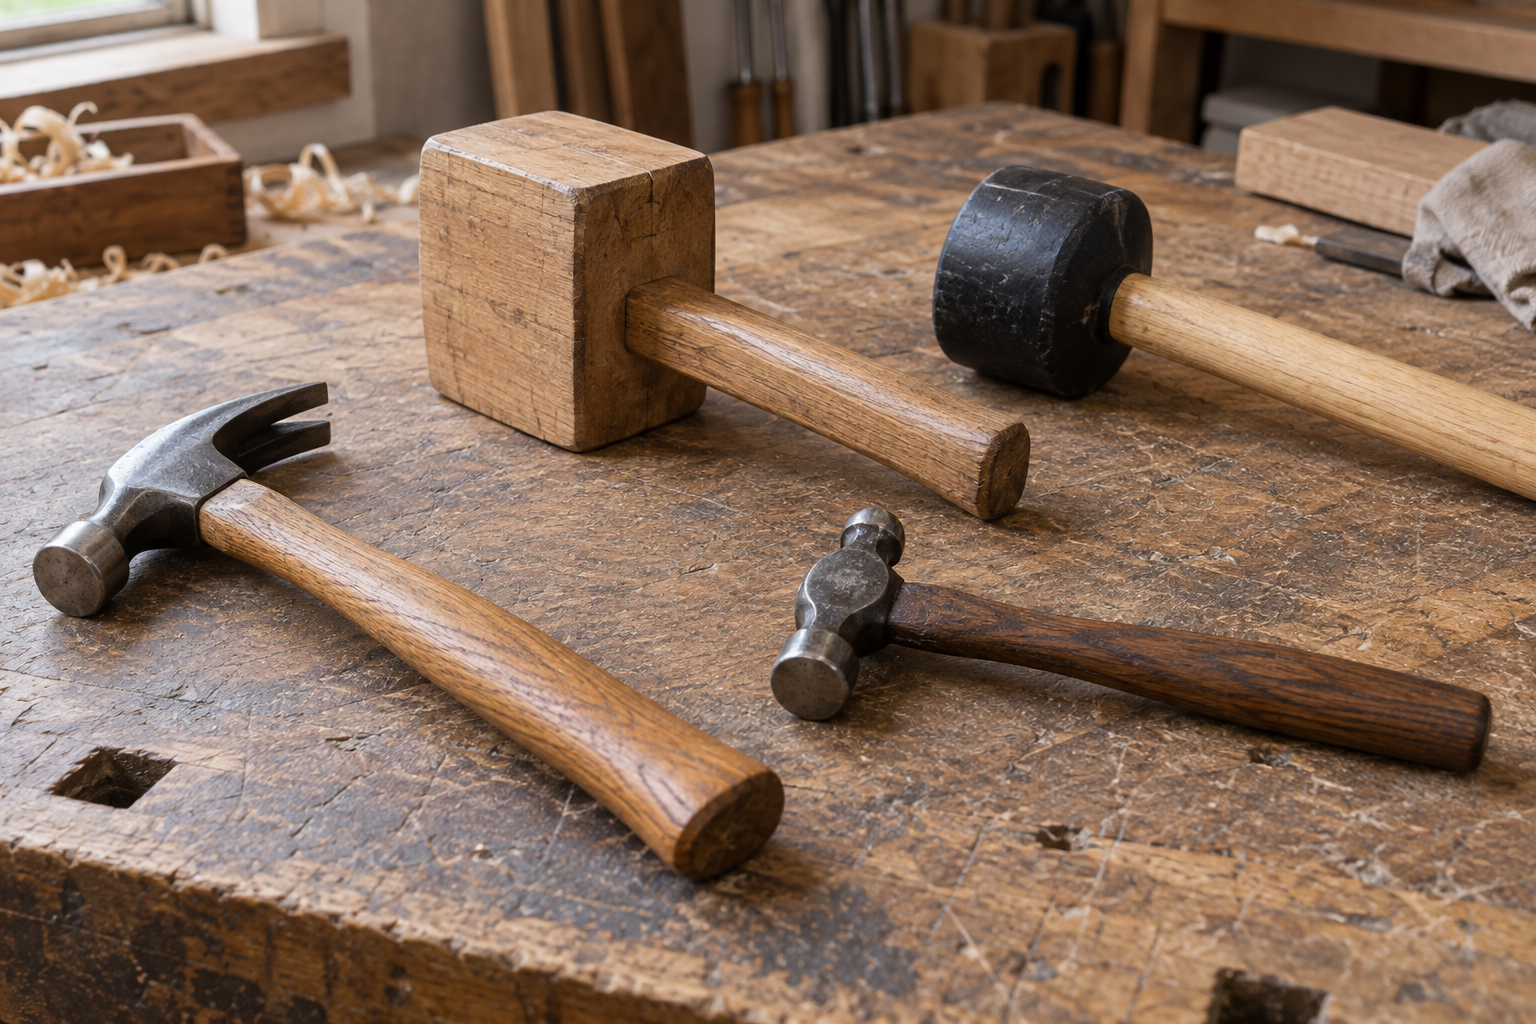
Adjusting machine components often calls for a hammer that delivers force without marking the part. Brass and steel are both useful, but they behave very differently at the point of impact. Choosing the wrong one can mushroom a shaft, raise a burr on a machined edge, distort a bearing seat, or leave dents that interfere with alignment.
For most adjustment work, brass is the safer starting point. Steel is the better choice when you need maximum driving force and the struck component is hard, rugged, or protected by a sacrificial punch. The right choice depends less on the hammer’s weight than on the hardness, finish, and replaceability of the part being hit.
As an Amazon Associate we earn from qualifying purchases at no extra cost to you.



Our Top Picks

How a brass hammer behaves
Brass is softer than tool steel and typically deforms before the machine component does. That makes it useful for seating keys, nudging shafts, aligning fixtures, setting slides, and tapping parts into position without cutting deep impact marks into them.
A brass hammer also produces less rebound than a hardened steel hammer. The blow feels more controlled, which matters when making small adjustments to a vise, lathe setup, milling fixture, or assembly. Brass is not soft enough to be harmless, however. A heavy blow can still dent aluminum, copper, bearing races, precision-ground surfaces, and thin sheet metal.
The main failure mode is brass transfer. Repeated impacts can leave yellow metal smeared onto the workpiece, especially when the surface is rough, dirty, or struck at an angle. This transfer is usually removable, but it can contaminate a clean assembly. Brass hammers also mushroom at the face over time. The raised edge should be filed or turned down before it breaks away as a chip.
For general machine adjustment, a brass engineers hammer in the 8- to 16-ounce range covers many jobs. Choose a larger 24- to 32-ounce version for stubborn slides or heavy fixtures, but remember that weight increases the damage potential as well as the driving force.
How a steel hammer behaves
Steel hammers deliver a sharper, more efficient blow. A 16-ounce steel hammer generally drives harder than a brass hammer of the same nominal weight because its face deforms less and transfers more energy into the target. This is useful for breaking a stuck taper, shifting a heavy fixture, or driving a punch through a resistant part.
The trade-off is damage. A steel face can raise a burr on a shaft, flatten a retaining ring, distort a threaded end, or dent a machined surface after only one badly placed strike. Hardened hammer faces are especially unforgiving. Do not use a steel hammer directly on a precision component unless the mark is acceptable or a soft, properly fitted intermediate tool is protecting the surface.
Steel is also more likely to rebound. That makes glancing blows less predictable and increases the chance of a slipped hammer contacting a nearby bearing, encoder, seal, or finished housing. A steel hammer is best treated as a force tool, not a fine-adjustment tool.
A standard 16-ounce ball-peen hammer is a practical steel option for mechanics. Its flat face handles general striking, while the peen supports some riveting and shaping work. For machine adjustment, use the flat face and keep the peen away from finished components.
Brass hammer vs. steel hammer
| Factor | Brass hammer | Steel hammer |
|---|---|---|
| Surface damage | Lower risk, but can still dent soft metals | High risk on machined or soft parts |
| Impact force | Moderate and controlled | High and concentrated |
| Rebound | Generally lower | Generally higher |
| Material transfer | May leave brass smears | May leave steel marks or cause burrs |
| Best use | Alignment, seating, and adjustment | Heavy driving and stubborn disassembly |
| Maintenance | Dress mushroomed face; remove transfer | Inspect for chips, cracks, and damaged face |
| Typical cost | Usually higher than basic steel | Often the cheaper option |
Choose by the component, not the hammer
Use brass directly on parts that have a visible or functional finished surface: fixture plates, slides, shafts, keys, collars, and housings. A brass hammer is also a good choice when the adjustment is incremental. Several light taps are easier to control than one heavy blow, and they give you time to check alignment between impacts.
Use steel when the struck area is sacrificial or when the force requirement is high. Examples include a removable drift, a robust steel fixture, a seized sleeve, or a thick structural bracket. Even then, a steel hammer should normally strike a punch or drift rather than the machine part itself. Select a punch made from suitable tool steel, keep its tip seated squarely, and replace it if the striking end has a spreading lip or visible cracks.
For bearings, never strike the rolling elements or an incorrect race. If installing a bearing, apply force only to the race being fitted. A brass hammer may reduce cosmetic damage, but it will not prevent brinelling caused by transmitting installation force through the balls or rollers.
When working near magnets, sensors, or contamination-sensitive assemblies, brass can be preferable to steel because it is nonmagnetic and less likely to pull small ferrous chips toward the component. It is not automatically suitable for electrical work: brass conducts electricity, so isolate power and use the correct insulated tools where required.
What to buy
If you adjust machinery regularly, buying both types is worthwhile. Start with a 12- or 16-ounce brass hammer for routine alignment and a 16-ounce steel hammer for general driving. Add a set of brass drift punches when you need to reach recessed parts without putting the hammer head against the work.
If you only perform occasional repairs, the cheaper steel hammer is fine when you also buy appropriate punches and accept that it is a general force tool. Do not make it your default hammer for finished machine surfaces. Conversely, a brass hammer is worth the extra cost when replacing or refinishing one damaged shaft, bearing seat, or fixture would cost far more than the tool.
Safe use and maintenance
Inspect both hammer and workpiece before striking. Secure the machine or fixture, remove loose keys and fasteners, and wear eye protection. Keep the hammer face square to the target; an angled blow is more likely to skid, burr the part, or throw fragments.
Never use a hammer with a loose handle, chipped face, or mushroomed striking edge. Dress brass with a file or lathe tool, and discard a steel hammer if the face is cracked or badly chipped. If repeated blows are needed, stop and find out why the component is stuck. More hammer force may hide a seized fastener, an interference fit, or an alignment problem that should be corrected first.